 how-to
How to Fix Gaps in Existing Hardwood Floors
Table of Contents
- Why Gaps Form in Hardwood Floors
- Seasonal Gaps in Hardwood Floors and What They Mean
- Assessing Gap Width and Deciding When to Repair
- Best Filler for Hardwood Floor Gaps
- Wood Floor Putty vs. Wood Slivers: Which Method Works Best
- How to Fill Gaps in Hardwood Floors Without Sanding
- Tools and Materials You'll Need
- Common Mistakes to Avoid When Fixing Hardwood Floor Gaps
- Frequently Asked Questions
Last Updated: October 14, 2026
Why Gaps Form in Hardwood Floors
Gaps in hardwood floors are natural: wood expands when humidity rises and contracts when it drops. This seasonal movement is normal in any hardwood floor.
Several factors cause gaps to form:
- Seasonal humidity changes, Wood absorbs and releases moisture throughout the year
- Temperature fluctuations, Heat and cold affect wood density
- Installation issues, Improper acclimation before installation can lead to gaps later
- Age and settling, Older homes and newly constructed homes both experience foundation movement
- Moisture problems, Basement leaks or high humidity can accelerate wood movement
Understanding why gaps form helps homeowners decide whether to fix gaps hardwood floors or leave them alone. Not every gap needs fixing, some are just your floor doing what wood naturally does.
Seasonal Gaps in Hardwood Floors and What They Mean
Wood floors expand and contract with the seasons: winter heating lowers humidity and the floor contracts, while summer humidity makes it expand. This is normal seasonal movement.
Normal seasonal movement vs. structural problems
Is this gap normal, or does it signal a real problem?
Normal seasonal gaps are narrow (less than 1/8 inch) and appear and disappear with the seasons, most visible in winter when the air is dry. They usually close when humidity returns in spring.
Structural or moisture problems look different: gaps wider than 1/4 inch, gaps that don't close seasonally, or gaps with cupping (edges higher than center) or crowning (center higher than edges) suggest moisture damage, foundation movement, or improper installation.
Treating a normal seasonal gap like a structural problem can cause more damage: rigid filler in a seasonal gap can crack or push boards out of place when the floor expands in summer.
Moisture and acclimation checks before repair
Before you repair any gap, check for moisture problems. Moisture is the enemy of hardwood floors.
Check your subfloor for moisture:
- Use a moisture meter on the subfloor beneath the gap
- Healthy wood should read between 6-9% moisture content
- Readings above 12% indicate a moisture problem that needs fixing first
Check for signs of water damage:
- Look for discoloration or dark staining around the gap
- Feel for soft or spongy wood
- Smell for musty odors
Verify proper acclimation:
- New hardwood should acclimate to your home for 5-7 days before installation
- Your home's humidity should be between 30-50% year-round
- If humidity swings wildly, gaps will return no matter how well you fill them
If you find moisture problems, fix those first. Filling gaps in a damp environment wastes time and money: the filler won't hold, and the underlying problem will worsen.
Assessing Gap Width and Deciding When to Repair
Not every gap needs repair, width determines whether filling it makes sense.
Gaps under 1/8 inch: Cosmetic only. Leave them alone unless they bother you visually; they won't affect durability or function.
Gaps between 1/8 and 1/4 inch: The sweet spot for filling, noticeable but narrow enough for standard fillers like wood filler or rope filler.
Gaps wider than 1/4 inch: These suggest something more serious.
Gaps that change seasonally: Normal movement.
Gaps that stay open year-round: These suggest structural or moisture problems; filling won't solve the underlying issue.
Before you fix gaps hardwood floors in existing hardwood, ask: does this affect function or just appearance?
Best Filler for Hardwood Floor Gaps
The right filler depends on gap width and whether the gap moves seasonally.
Wood filler for small gaps
Wood filler is the go-to for small gaps under 1/4 inch: affordable, easy to apply, and effective when the gap is stable.
Wood filler comes in two types:
Water-based wood filler dries quickly, cleans up with water, and shrinks slightly, so deep gaps may need two applications. Best for gaps that don't move much.
Oil-based wood filler dries slower but shrinks less, bonds better, and lasts longer, better for high-traffic areas.
Both types come in colors to match your hardwood. Sand the dried filler smooth, then stain and seal to match your floor finish, mismatched filler stands out and defeats the repair.
Rope filler and wood strips for wider gaps
For gaps wider than 1/4 inch, wood filler alone won't work, you need something that spans the gap without shrinking much.
Rope filler is twisted rope made from wood fiber or synthetic material. Press it into the gap and it stays put; its flexibility lets it move with seasonal expansion and contraction, ideal for gaps that change width.
To use rope filler:
- Clean the gap thoroughly
- Press the rope into the gap with a putty knife
- Leave it slightly proud of the surface
- Sand it flush once it's dry
- Stain and seal to match
Wood strips or slivers work for larger gaps. Cut a thin strip of hardwood to fit snugly, glue it with PVA glue (like Titebond), then sand flush, stain, and seal.
Wood strips are more durable than filler for wide gaps and look more natural, but require more skill to fit and match grain and color.
Wood Floor Putty vs. Wood Slivers: Which Method Works Best
Wood floor putty is a thick paste that hardens as it dries and fills gaps quickly. It shrinks slightly, so deep gaps may need a second application. Best for small to medium gaps that don't move much.
Wood slivers or strips are actual wood cut to fit the gap. They move with the floor, work better for seasonal gaps, and look more natural by matching the grain.
Choose putty if:
- Your gaps are under 1/4 inch
- The gaps don't change seasonally
- You want a quick, easy fix
- You're comfortable matching stain colors
Choose wood slivers if:
- Your gaps are wider than 1/4 inch
- The gaps open and close seasonally
- You want a repair that lasts longer
- You're willing to spend more time on the job
For most homeowners, putty works fine for small seasonal gaps; for wider, stable gaps, slivers are worth the effort.
How to Fill Gaps in Hardwood Floors Without Sanding
You can fill gaps without sanding your entire floor, ideal for isolated gaps or small problem areas.
Step 1: Clean the gap thoroughly
Remove all dust and debris from the gap first, dust prevents the filler from bonding.
Tools you'll need:
- Vacuum with a crevice attachment
- Putty knife or scraper
- Small brush or compressed air
Steps:
- Vacuum out loose dust and debris
- Use a putty knife to scrape out any hardened filler or dirt
- Wipe the gap with a damp cloth to remove fine dust
- Let it dry completely before filling
A clean gap is essential. Filler won't stick to dust, and your repair will fail quickly.
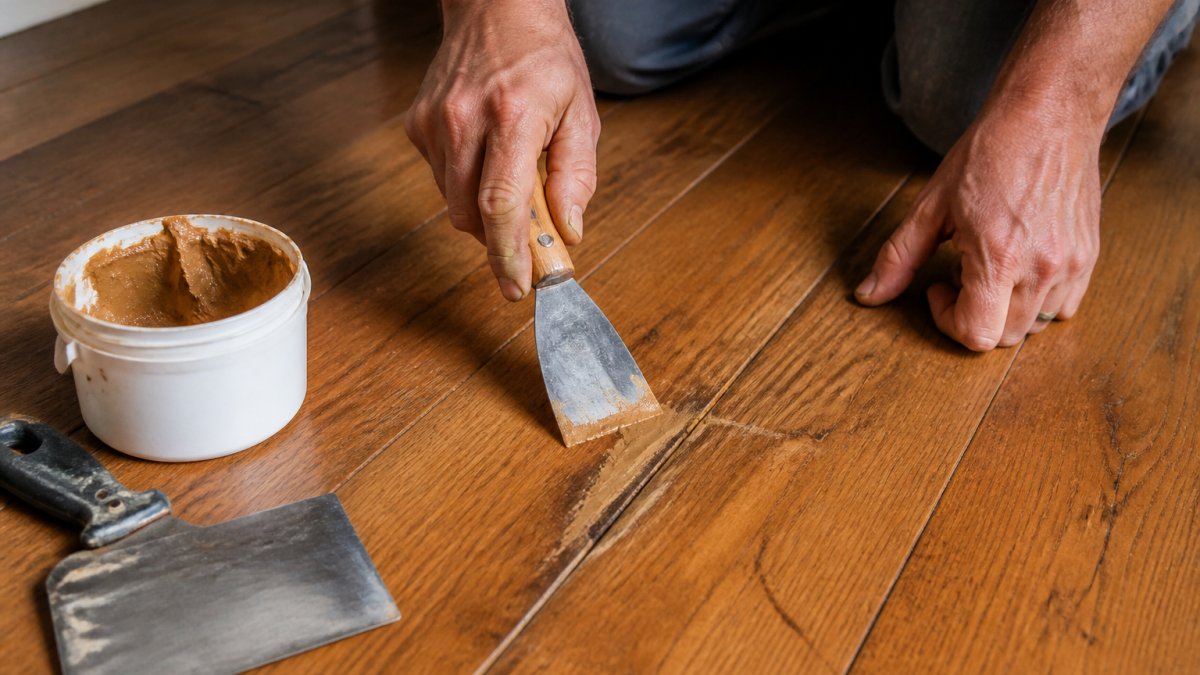
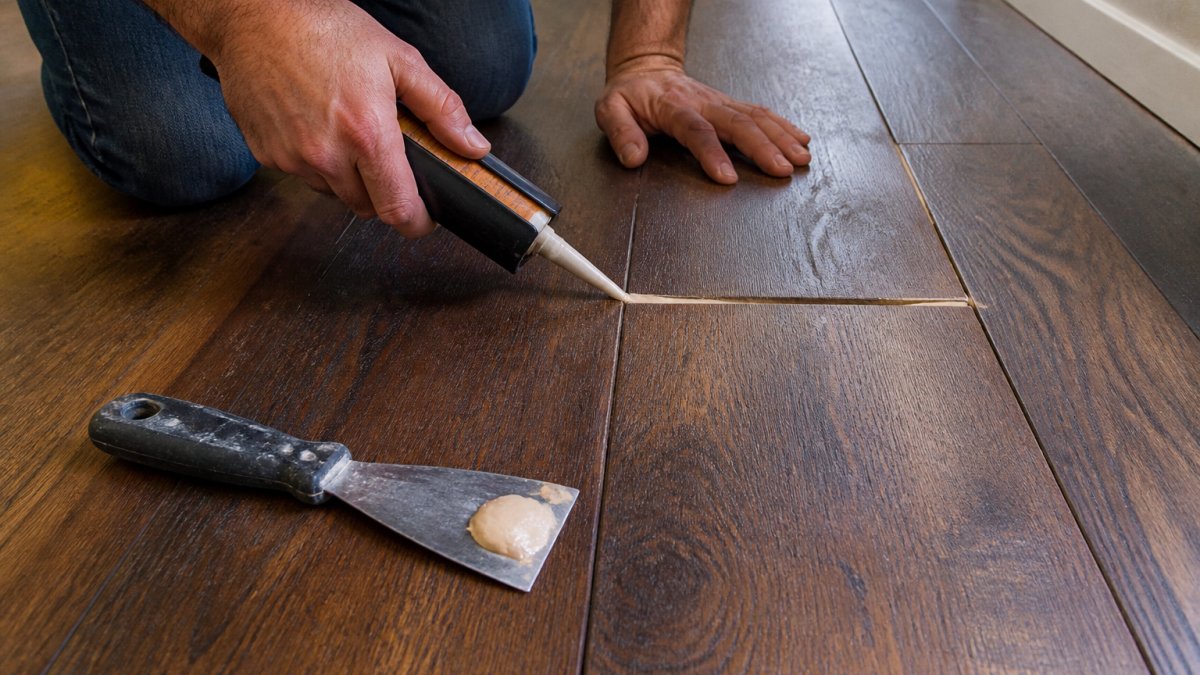
Step 2: Prepare and apply filler
Choose your filler by gap width: wood filler for small gaps, rope filler or wood strips for wider ones.
For wood filler:
- Open the filler container and stir well
- Use a putty knife to scoop filler into the gap
- Press it down firmly so it fills the entire depth
- Overfill slightly, the filler will shrink
- Smooth the surface with the putty knife
For rope filler:
- Unroll a length of rope filler
- Press it into the gap with your fingers or a putty knife
- Work it down into the gap so it's snug
- Leave it slightly proud of the surface
For wood strips:
- Measure the gap width and depth
- Cut a strip of matching hardwood to fit
- Apply PVA glue to the strip
- Press it into the gap firmly
- Wipe away excess glue with a damp cloth
Let the filler cure per product instructions, most cure in 2-4 hours, some longer.
Step 3: Scrape excess and let cure
Once dry, scrape away any excess proud of the surface.
Use a putty knife at a shallow angle to avoid gouging the wood, working from the gap's sides toward the center in light passes.
For rope filler, sand smooth after scraping with 120-grit paper, lightly following the wood grain.
Let everything cure fully before the next step, rushing can damage the repair.
Step 4: Touch up the finish
The final step is matching your floor's stain and finish.
Stain the filler:
- Test your stain on a hidden area first
- Apply stain with a small brush or cloth
- Match the color to your surrounding floor
- Let it dry completely
Apply protective finish:
- Use the same finish as your floor (polyurethane, wax, oil, etc.)
- Apply a thin coat with a brush or cloth
- Let it dry and cure per product instructions
- Apply a second coat if needed for durability
The finish protects the repair and blends it in; a good stain and finish match makes it nearly invisible.
Tools and Materials You'll Need
Gather everything before you start, the right tools make the job easier and faster.
Essential tools:
- Vacuum with crevice attachment
- Putty knife or scraper
- Small brush for stain
- Cloth or rag
- Sandpaper (120-grit for smoothing)
- Moisture meter (to check for moisture problems)
Materials for small gaps:
- Wood filler (water-based or oil-based)
- Stain matching your floor color
- Protective finish (polyurethane, wax, or oil)
Materials for wider gaps:
- Rope filler or wood strips
- PVA wood glue (for strips)
- Stain
- Protective finish
Safety items:
- Work gloves (optional but recommended)
- Dust mask (if sanding)
- Proper ventilation (if using oil-based products)
Most items are inexpensive and available at any hardware store. The most important investment is the stain color, bring a floor sample to match it perfectly.
Common Mistakes to Avoid When Fixing Hardwood Floor Gaps
Even simple gap repairs can go wrong. Common mistakes we see:
Filling without cleaning first. Dust and debris prevent bonding and the repair fails quickly. Always vacuum and wipe the gap clean first.
Ignoring moisture problems. If moisture causes the gap, filling won't help, the filler will crack and the wood will keep moving.
Using the wrong filler for the gap width. Wood filler suits small gaps; wider gaps need rope filler or wood strips.
Overfilling and not sanding smooth. Unsanded excess looks obvious and catches light. Scrape and sand it level with the surrounding floor.
Mismatching the stain color. A wrong-color repair stands out more than the original gap.
Rushing the cure time. Filler needs time to dry and harden; sanding or staining too soon weakens the repair. Follow cure times exactly.
Not sealing the repair. The filler needs the same protective finish as your floor, or it wears faster and looks different.
The best repairs take time and attention to detail; rushing leads to failures that need redoing. At Freddie Sanchez Hardwood Floors, we recommend doing it right the first time.
Frequently Asked Questions
What is the best way to fill gaps in hardwood floors?
The best method depends on gap width. Small gaps (under 1/8 inch) work well with wood filler or putty that matches your floor color. Wider gaps (1/8 to 1/4 inch) often require wood strips or slivers glued in place. For gaps wider than 1/4 inch, consider rope filler or professional repair. Always clean debris first, apply the filler or strip, and let it cure fully before finishing.
Can seasonal gaps in hardwood floors be repaired permanently?
Seasonal gaps caused by normal wood movement cannot be permanently filled in the traditional sense. Wood naturally expands and contracts with humidity changes. Flexible fillers and rope products accommodate this movement better than rigid fillers. If gaps widen and narrow predictably with seasons, focus on fillers designed for movement. If gaps remain large year-round, moisture issues may be the cause and should be addressed first.
How to fill gaps in hardwood floors without sanding?
Clean the gap thoroughly with a vacuum and damp cloth to remove dust and debris. Apply wood filler, putty, or insert wood slivers with adhesive, depending on gap size. Scrape away excess material before it dries. Once cured, apply a matching stain or finish to blend the repair with surrounding wood. This no-sand method works for gaps that don't require full floor refinishing.
Should you fill gaps in old hardwood floors?
Fill gaps if they are consistently wide, trap debris, or affect appearance. Small seasonal gaps that close in humid months typically don't need filling. Large, persistent gaps may signal moisture or structural issues that should be investigated first. For older homes, check moisture levels and ensure proper acclimation before deciding to repair. Historic floors may benefit from professional assessment to preserve their character and integrity.