 how-to
Hardwood Flooring for Master Bedroom Remodel Guide
Table of Contents
- What Is the Best Flooring for a Master Bedroom Remodel?
- Hardwood Floors in Bedrooms: Pros and Cons for Bay Area Homes
- Master Bedroom Flooring Ideas: Wood Species, Grain, and Color
- The Hardwood Floor Installation Process, Step by Step
- What a Master Bedroom Remodel Budget Actually Includes
- Bedroom-Specific Performance: Pets, Allergies, Radiant Heat, and Noise
- Choosing the Right Hardwood Flooring Installer for Your Remodel
- Conclusion: Sequencing Your Master Bedroom Remodel
- Frequently Asked Questions
Last Updated: October 10, 2026
What Is the Best Flooring for a Master Bedroom Remodel?
The best flooring for a master bedroom remodel balances comfort, durability, and resale value. For most Bay Area homes, hardwood flooring wins that trade-off.
At Freddie Sanchez Hardwood Floors, we install wood floors for homeowners across San Martin and the wider Bay Area.
So here is the honest comparison before you commit to anything:
| Flooring | Best For | Watch Out For |
|---|---|---|
| Solid hardwood | Long-term value, refinishing | Moisture sensitivity |
| Engineered hardwood | Slab foundations, radiant heat | Limited refinishing |
| Luxury vinyl plank | Tight budgets, wet areas | Looks less natural up close |
| Laminate | Quick, low-cost updates | Can't be refinished |
| Carpet | Softness underfoot | Traps dust and allergens |
The rest of this guide walks through species, installation, budget, and how to sequence the whole remodel.
Hardwood Floors in Bedrooms: Pros and Cons for Bay Area Homes
Hardwood floors in bedrooms offer warmth, easy cleaning, and strong resale appeal. The trade-offs are cost, moisture sensitivity, and noise compared with carpet.
The pros:
- Easy to clean and allergy-friendly
- Refinishable for decades of use
- Adds resale value
The cons:
- Higher upfront cost than carpet or vinyl
- Cold underfoot in winter
- Squeaks and gaps can develop over time
Solid Hardwood vs. Engineered Hardwood: Which Belongs in a Bedroom?
Solid hardwood is one piece of wood from top to bottom, so it can be sanded and refinished many times. Engineered hardwood has a real wood top layer over a plywood core, which handles humidity swings better.
For a bedroom, the choice usually comes down to your subfloor and moisture levels. The National Wood Flooring Association guidance on engineered vs. solid flooring explains how each performs in different conditions.
Master Bedroom Flooring Ideas: Wood Species, Grain, and Color
Wood species and color set the mood more than any other choice. White oak and red oak dominate for good reason: they take stain evenly and hide daily wear well.
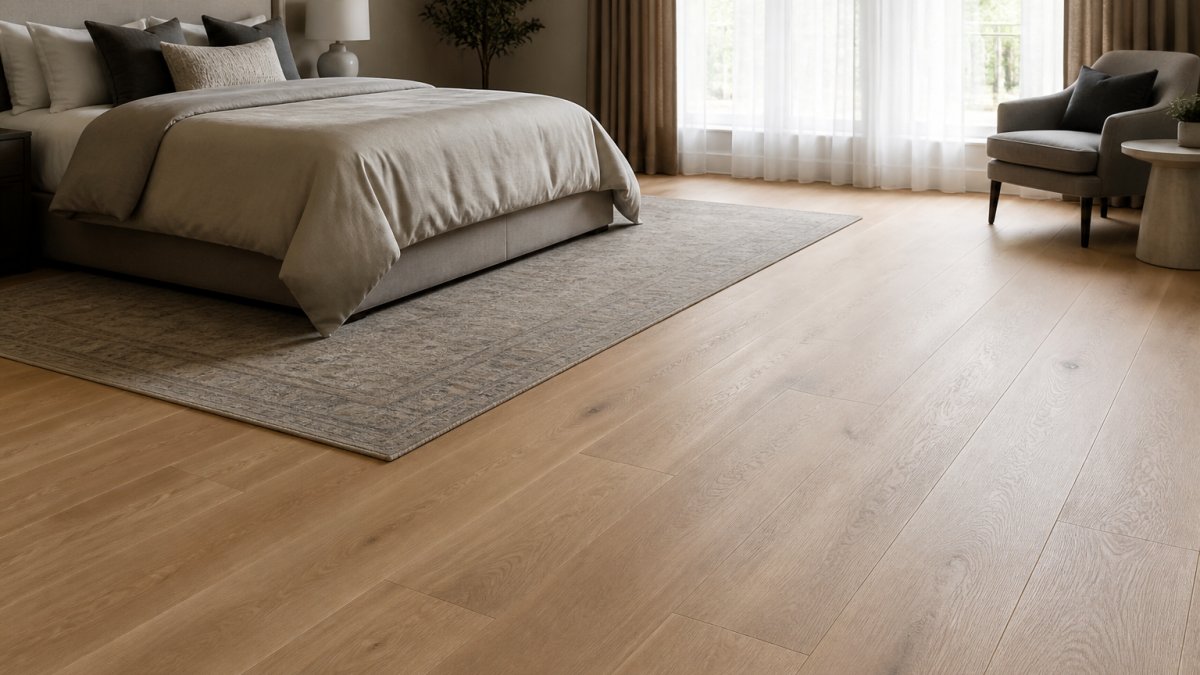
A quick guide to the main options:
- White oak: light, neutral, very popular
- Red oak: warmer tone, slightly more grain
- Maple: clean and uniform, great for modern rooms
On color, light wood makes small rooms feel bigger. Medium tones hide dust best. Dark wood looks striking but shows every speck.
Matching Your Floors to the Master Bathroom and Closet
A unified look comes from repeating one floor tone across the bedroom, closet, and master bathroom. Keep the same species and finish throughout, or use a close match in a water-resistant material for the bath.
Door clearances matter here. Adding a new floor raises the floor height, so doors may need trimming. Plan transitions at the bathroom and closet thresholds early, not after installation.
The Hardwood Floor Installation Process, Step by Step
The hardwood floor installation process follows a fixed sequence, and skipping a step is what causes cupping, gaps, and callbacks later. What most guides leave out is the decision-making inside each step, the part that actually determines whether your bedroom floor stays flat for twenty years.
Here is the full sequence, with the decisions that matter at each stage:
- Measure and document the room. Record length, width, and any offsets for closets, doorways, and the ensuite threshold. Order 5-10% extra material for cuts, defects, and future repairs, bedroom layouts with a closet return and a bathroom door usually land at the higher end.
- Inspect the subfloor. Check for flatness, deflection, squeaks, and previous water damage. Most wood flooring manufacturers specify a flatness tolerance over a set distance (commonly 3/16 inch in 10 feet, though you should confirm your specific product's requirement). High spots get ground down; low spots get filled with a patching compound.
- Test moisture in the subfloor and the wood. A pin or pinless moisture meter gives you readings you can compare against the flooring manufacturer's limit for your region and subfloor type. On a slab, a calcium chloride test or in-situ relative humidity probe is the standard method.
- Let the wood acclimate. Boards sit in the room, in their boxes, at the humidity level they'll live in. The time depends on species, thickness, and packaging, often several days, sometimes longer for solid wood in a dry climate.
- Repair or level the subfloor. Fix squeaks, re-secure loose panels, and address any structural deflection before a single board goes down.
- Install underlayment or a moisture barrier. This is where the installation method gets chosen (see below).
- Lay the floor boards. Racking, spacing, and staggering end joints so they don't line up across rows.
- Sand, stain, and finish. On-site finishing lets you match the bedroom, closet, and bath in one continuous tone.
- Reinstall baseboards, trim, and transitions. Door undercuts, threshold strips at the bath, and shoe molding go back last.
Choosing an Installation Method: Nail, Glue, Staple, or Float
The right method depends on your subfloor, your flooring type, and your home's moisture profile:
- Nail or staple down: The standard for solid hardwood over a wood subfloor on a raised foundation. Fasteners go through the tongue at an angle, and the boards are held by the subfloor itself.
- Glue down: Common for engineered hardwood over concrete slabs. The adhesive also acts as a moisture barrier when the manufacturer rates it that way.
- Float: Boards lock together and rest on underlayment without fasteners. It's the fastest option and works over some uneven substrates, but it feels different underfoot and can sound hollow in a quiet bedroom.
Subfloor Prep, Moisture Testing, and Acclimation
Subfloor prep, moisture testing, and acclimation are the three steps most DIY guides skip, and they cause the most failures. Moisture testing shows whether the subfloor is dry enough for wood.
A common mistake is rushing acclimation to save a day or two. That shortcut leads to gaps in winter and buckling in summer. If your home has known moisture issues, test first and address them before any wood goes down.
DIY Versus Professional Installation
A bedroom is one of the more forgiving rooms to install yourself, it's usually a simple rectangle with one or two doorways and no cabinetry to cut around. But three things push most homeowners toward a pro:
- Tools. A flooring nailer, a moisture meter, a table saw, and a finish sander add up fast, and rental versions eat into the savings.
- Finishing. On-site sanding and staining is the hardest part to get right, and a bad stain job is expensive to undo.
- Warranty. Most manufacturers require installation to their published standards for the warranty to hold. A DIY install that skips a moisture barrier can void coverage.
If you're handy and the subfloor is flat and dry, a prefinished engineered floor is the most realistic DIY path. Solid hardwood that needs on-site finishing is usually best left to a crew.
What a Master Bedroom Remodel Budget Actually Includes
A master bedroom remodel budget covers far more than the flooring itself. Most homeowners forget the removal, prep, and finishing costs until the quote arrives, and those are exactly the line items that separate a low bid from a realistic one.
Here is what each line item actually covers, and what drives it up or down:
- Tear-out and disposal. Removing carpet is fast and cheap. Removing glued-down engineered flooring or tile is slow, and tile often damages the subfloor underneath. Disposal fees scale with volume and whether the old material can be recycled.
- Subfloor repair or leveling. Minor patching is routine. Replacing rotted plywood, sistering joists, or pouring self-leveler over a slab is a separate scope and can rival the flooring cost itself.
- Underlayment or moisture barrier. Cost depends on whether you need a simple foam underlayment or a full vapor barrier system rated for your subfloor.
What Actually Drives the Final Number
Four factors move a bedroom flooring budget more than anything else:
- Room size and layout. A simple rectangle is cheaper per square foot than a room with a walk-in closet, a bay window, or multiple doorways.
- Subfloor condition. A flat, dry, sound subfloor keeps prep minimal. Anything else adds cost before the first board goes down.
- Material choice. Solid versus engineered, standard versus wide plank, and the finish you select all shift the material line significantly.
- Scope of the wider remodel. If the flooring is part of a larger bedroom remodel, sequencing with painting, trim, and closet work affects labor and schedule.
How to Compare Quotes
Ask every installer for the same breakdown: material, labor, prep, finishing, trim, and disposal, listed separately. A quote that bundles everything into one per-square-foot number makes it impossible to see where the money is going, and impossible to compare fairly against another bid.
Also ask what's excluded. Common exclusions include subfloor repair beyond minor patching, door trimming, and moving furniture. Those exclusions are where a low bid turns into a higher final invoice.
Bedroom-Specific Performance: Pets, Allergies, Radiant Heat, and Noise
Bedroom performance factors decide how happy you'll be with the floor five years from now. Pets, allergies, radiant heat, and noise all play a role.
- Pets: scratches show more on dark, glossy finishes; a matte finish hides them better
- Allergies: hardwood holds far less dust and dander than carpet
- Radiant heat: engineered hardwood handles it best
If sound transmission between floors is a concern, underlayment and a thick rug do more than any board choice.
Choosing the Right Hardwood Flooring Installer for Your Remodel
The right installer matters more than the wood you pick. Poor installation ruins good material, and the fix usually means starting over.
Ask any installer these questions:
- Can I see photos of similar bedroom projects?
- How do you test for moisture before installing?
- Who handles the trim, baseboards, and transitions?
For a remodel, coordination is everything. Your flooring crew has to work around your contractor's schedule, and that takes constant communication, not just a start date.
Conclusion: Sequencing Your Master Bedroom Remodel
A master bedroom remodel succeeds when the floor is planned first, not last. Pick the material, prep the subfloor, budget for the hidden costs, and lock in your installer before the schedule tightens.
That's where Freddie Sanchez Hardwood Floors comes in. We handle expert wood floor installation with high standards of craftsmanship and durability.
Get a Free Quote and let us bring your master bedroom floor to life with precision.
Frequently Asked Questions
What is the best flooring for a master bedroom?
Hardwood flooring is the most common choice for a master bedroom because it adds warmth, improves resale value, and works with almost any interior design style. Solid or engineered hardwood in a light or medium tone keeps the room feeling calm and open. If moisture or budget is a concern, luxury vinyl plank and laminate are practical alternatives, and carpet still makes sense for anyone who wants maximum softness underfoot.
Should you put hardwood floors in bedrooms?
Yes, for most households. Hardwood floors in bedrooms hold up well, are easy to clean, and help the room feel connected to the rest of the home. The main drawbacks are cost and noise, since hard surfaces reflect sound more than carpet. An area rug under the bed solves most of the comfort and sound issues, and it also protects the finish where foot traffic is heaviest.
How long does hardwood floor installation take in a bedroom?
A typical master bedroom takes two to four days for installation once the subfloor is ready. Add time for removal of old flooring, moisture testing, and acclimation of the wood, which usually means letting the boards sit in the room for several days before installation. Finishing, if the floor is sanded and sealed on site, adds another two to three days of dry time before furniture goes back in.
What should you consider before installing hardwood in a bedroom?
Check the subfloor for flatness and moisture before anything else, since those two issues cause most cupping and squeaking complaints later. Plan the remodel sequence so flooring goes in after painting but before baseboards and trim. Also confirm door clearances and how the new floor will meet the closet, hallway, or master bathroom, because transitions and height differences need to be worked out before installation day.