 how-to
How to Fix Squeaky Hardwood Floors: 7 Proven Steps
Table of Contents
- Find the Source Before You Fix Anything
- What You'll Need: Tools, Fasteners, and Safety Gear
- How to Fix Squeaky Floors from Below: Shimming and Screwing
- The Best Lubricant for Squeaky Floors (And How to Apply It)
- Repairing from Above: Nails, Screws, and Squeak Kits
- What It Costs to Repair Squeaky Hardwood Floors
- Floating Floors, Humidity, and When to Call a Professional
- Preventative Maintenance and Finish Restoration
- Frequently Asked Questions
Last Updated: September 26, 2026
Find the Source Before You Fix Anything
A squeak is a clue, not the problem. Fixing squeaky hardwood floors starts with finding where wood rubs against wood, a nail, or a joist. Noise points to movement, and movement points to a loose connection.
Why Squeaks Happen: Friction, Movement, and Loose Fasteners
Three things cause almost every squeak:
- Friction between a board and a nail shank
- Movement in a loose board that was never fully fastened
- Gaps between the subfloor and the joists beneath it
Seasonal expansion makes all three worse: wood shrinks and gaps open in dry winter, then swells and presses together in humid summer.
DIY Diagnostic: Walking Test, Chalk Test, and Crawl Space Check
Find the source before you touch a tool:
- Walking test. Walk slowly in soft shoes and mark each squeak with painter's tape.
- Chalk test. Rub chalk on the suspected board edges, walk on it, and check for chalk transfer on the neighboring board, that shows movement.
- Crawl space check. From below, look for gaps between the subfloor and joists, backed-out nails, or dark rub marks.
What You'll Need: Tools, Fasteners, and Safety Gear
Gather everything first so you're not climbing out of a crawl space mid-repair.
Tools:
- Cordless drill with a driver bit
- Hammer and nail punch
- Stud finder
- Flashlight or headlamp
- Utility knife
Materials:
- Wood shims
- 1-1/4 inch wood screws or finishing nails
- Wood glue
- Graphite powder or talcum powder
- A squeak repair kit (for above-floor fixes)
Safety gear:
- Knee pads
- Safety glasses
- Dust mask
- Work gloves
How to Fix Squeaky Floors from Below: Shimming and Screwing
Fixing from below is the cleanest method because you never touch the finished surface, most pros reach for it first.
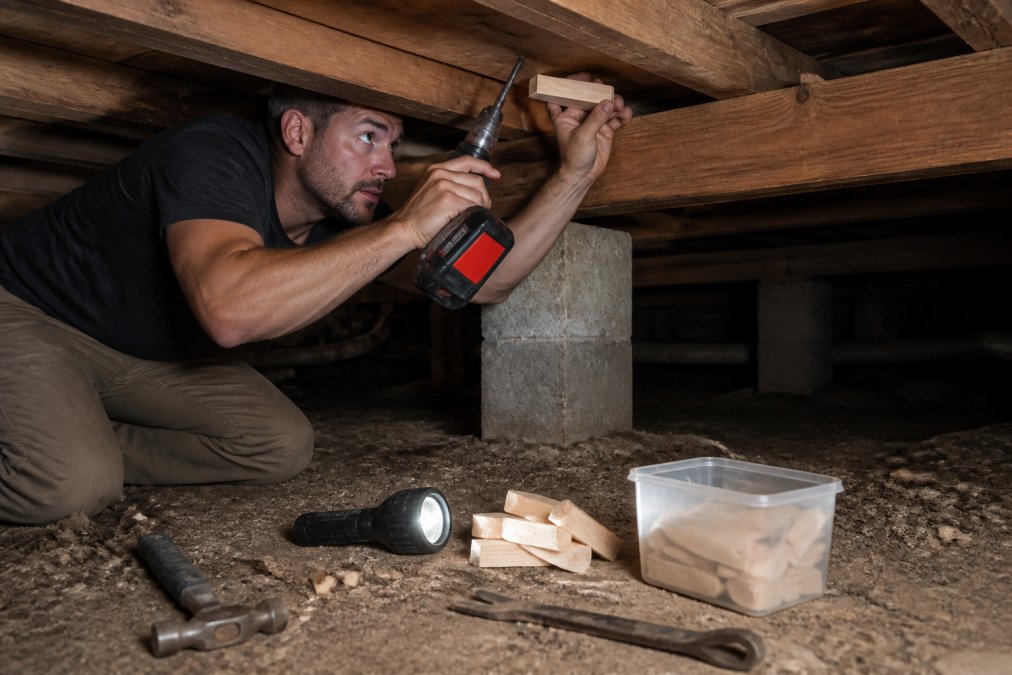
- Locate the gap. From the crawl space, find the space between the subfloor and the joist at the squeak.
- Coat the shim. Spread wood glue on both sides of a wood shim.
- Tap it in. Drive the shim into the gap with a hammer until snug, not forced.
- Snap the excess. Score the shim with a utility knife and snap off the protruding piece.
- Screw it down. Drive a wood screw at a slight angle through the subfloor into the joist, about two inches from the shim.
The Best Lubricant for Squeaky Floors (And How to Apply It)
The best lubricant for squeaky floors is a dry powder, not a liquid. Graphite and talcum reduce friction without adding moisture; oils attract dust and stain wood.
How to apply powder lubricant:
- Clean the gap between boards with a vacuum.
- Puff powder into the seam with a squeeze bottle.
- Work it in by walking on the spot a few times.
- Wipe away any excess with a dry cloth.
Repairing from Above: Nails, Screws, and Squeak Kits
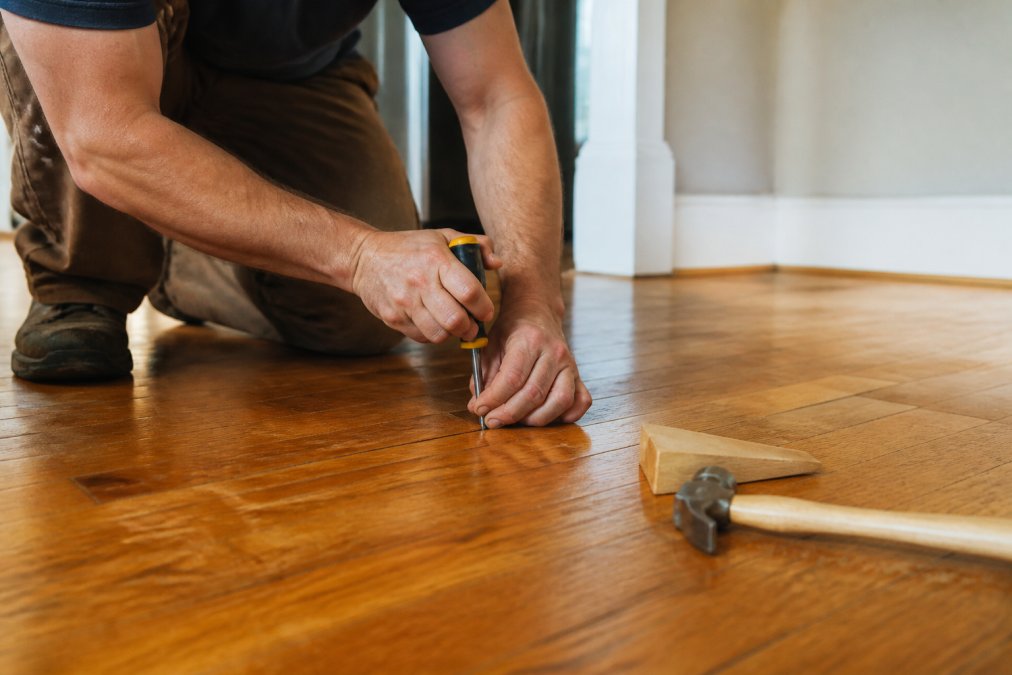
When the crawl space is inaccessible or blocked by ductwork, you fix from above, penetrating the finished surface, so the method must match your floor's construction and finish.
Match the Method to Your Floor Type
Not every above-floor fix works on every floor. The wrong method can crack a board, split a tongue, or telegraph through the finish.
The Screw-and-Plug Method, Step by Step
- Confirm the joist location. Use a deep-scan stud finder or measure from a known reference. Joists are typically 16 inches on center, but older homes vary. Mark the centerline with painter's tape.
- Drill a pilot hole at about 15 degrees through the board and into the joist, just under the screw shank diameter.
- Drive a trim-head screw (1-1/4 to 1-1/2 inch) until the head sits just below the surface. Stop before you crush the wood fibers.
- Countersink with a plug cutter or sharpened drill bit if the head protrudes.
- Fill the hole. Use color-matched wood filler for a sandable finish, or a wax filler stick for a fast, no-sand finish.
- Touch up the finish so the repair disappears (see below).
Squeak Repair Kits: What They Actually Do
A squeak repair kit uses a breakaway screw, a scored shank that snaps off below the surface when over-torqued. Drive it through a pilot hole, the head snaps off, and you fill the tiny hole with a wax stick. Kits are fast for one or two spots, but the breakaway screw holds less than a full trim-head screw, so it's a poor choice for a board moving a lot.
Nails: When They Work and When They Don't
Finishing nails work but loosen as wood moves. Angle them in pairs (one leaning left, one right) to resist movement both ways, and set them with a nail punch. Nails suit a quick fix; for a permanent repair, screws win.
Hiding the Repair: Finish Restoration
A structural fix that leaves a visible scar isn't finished. Match the filler to the floor's current color, not its original, wood darkens with age, so a fresh-sample match stands out.
- Wax filler sticks are fastest. Soften the stick with friction, press it into the hole, and buff flush with a plastic card. No sanding, no drying time.
- Wood filler is more durable but needs to dry and sand. Use it on larger holes and areas that will be walked on.
- Touch-up markers work for hairline scratches around the repair, not for filling holes.
- Finish touch-up. If you sanded through the finish, apply a thin coat of the same finish type (polyurethane, oil, or water-based) with a small artist's brush, feathering the edges so the sheen blends. Mixing finish types causes adhesion failure.
What It Costs to Repair Squeaky Hardwood Floors
The cost to repair squeaky hardwood floors depends on how many spots you have, whether the subfloor is accessible, and whether the fix is cosmetic or structural. One spot fixed from below costs far less than a full section pulled up and reinstalled.
Floating Floors, Humidity, and When to Call a Professional
Floating floors, humidity swings, and structural problems all produce the same squeak but need different responses. Use the decision tree below to route yourself to the right fix.
The Diagnostic Decision Tree
Work through these questions in order. Stop at the first one that matches your situation.
- Can you see the underside of the floor (crawl space, basement, or open ceiling below)?
- Yes → Fix from below. Shim and screw. See the from-below section.
- No → Go to question 2.
- Is the floor a floating system (no nails or staples visible at the seams, boards lock together, and the floor moves as one unit)?
- Yes → Go to the floating floor section below.
- No → Go to question 3.
- Is the squeak isolated to one or two spots, with no visible dip, bounce, or board movement?
- Yes → Fix from above with a screw or a squeak kit.
- No → Go to question 4.
- Do you see a dip, a bounce, cupping, crowning, or separation between boards?
- Yes → Call a professional. This is likely a structural or moisture problem, not a friction problem.
- No → Re-check your source. The squeak may be traveling from another spot.
Floating Floors: Why the Usual Fixes Don't Work
A floating floor has no fasteners. Boards lock together with a tongue-and-groove or click joint and rest on foam or cork underlayment, nothing to screw into and nothing to shim from below.
Squeaks in floating floors come from three sources:
- Movement between the board and the underlayment. The board slides slightly on the foam, and the friction makes noise.
- A joint that has opened. If the click joint has failed or the board has shifted, the two edges rub.
- A subfloor that isn't flat. Floating floors need a flat subfloor (typically within 3/16 inch over 10 feet). A low spot lets the board rock, and rocking makes noise.
What actually works on floating floors:
- Humidity control first. Floating floors are more sensitive to moisture swings than nailed floors because the whole system expands and contracts as a unit. Keep indoor humidity between 35% and 55% year-round; a humidifier in winter and dehumidifier in summer often silence the noise on their own.
- Check the expansion gap. Floating floors need a perimeter gap (usually 1/4 to 3/8 inch) under the baseboard. If the floor is pinched against a wall, it buckles and squeaks. Trim the gap if it's closed.
- Lubricate the joints, not the surface. A dry powder lubricant worked into the seam can quiet a rubbing joint. Never use liquid oil, it can damage the click joint and the underlayment.
- Do not screw or nail a floating floor. Fasteners lock the floor in place, defeat the purpose of a floating system, and void most manufacturers' warranties.
- If the subfloor is the problem, the fix is to pull the floor, flatten the subfloor, and reinstall. That's a professional job.
Humidity: The Invisible Cause
Wood moves with moisture: boards shrink and gaps open in dry winter, then swell and press together in humid summer. Both create squeaks. A hygrometer (under $20) tells you your indoor humidity; most manufacturers recommend 35% to 55%. Outside that range, you're inviting squeaks, cupping, and gaps.
When to Call a Professional
Call a professional when the squeak is a symptom, not the problem:
- A visible dip or bounce in the floor. This suggests a joist problem, a failed subfloor panel, or a support issue.
- Cupping, crowning, or separation between boards. This is a moisture problem that a shim won't fix.
- Water stains or soft spots near the squeak. Soft wood means rot, and rot means a structural repair.
- A floor over a basement with known moisture issues. The squeak may be the least of your problems.
- A crawl space you can't access safely (low clearance, standing water, exposed wiring, or pest damage).
- A floating floor that has buckled. This usually means the expansion gap has closed, and the fix is to pull and reinstall.
- A repair that has already failed once. If a shim or screw didn't hold, the underlying movement is bigger than a spot fix can handle.
Preventative Maintenance and Finish Restoration
Stopping squeaks before they start is cheaper than fixing them. A simple maintenance schedule keeps boards, fasteners, and joists working together.
| Task | Frequency | Why It Matters |
|---|---|---|
| Check indoor humidity | Monthly | Keeps moisture content stable |
| Walk-test for new squeaks | Seasonally | Catches loose boards early |
| Tighten visible fasteners | Annually | Stops friction before it starts |
| Inspect crawl space | Annually | Finds gaps and moisture |
| Clean and reseal finish | Every 3-5 years | Protects against moisture swings |
Frequently Asked Questions
What is the best lubricant to use on squeaky hardwood floors?
Graphite powder and talcum powder are the two most common dry lubricants for squeaky hardwood floors. Graphite works well for tongue-and-groove joints because it penetrates tight gaps and reduces friction without leaving a greasy residue. Talcum powder is a gentler option for finished surfaces. For a low-moisture formula, some homeowners use a specialized squeak repair kit that includes a lubricant designed for wood. Always test in an inconspicuous area first, and avoid oil-based products that can stain or attract dirt.
How do I fix squeaky floors from below without damaging the ceiling?
From below, you can fix squeaky floors by installing wood shims or driving screws through the subfloor into the joists. First, locate the squeak by walking above while someone listens below. Then, apply a thin layer of construction adhesive to a wood shim and tap it into the gap between the subfloor and joist. For a more permanent fix, drive 1-1/4 inch wood screws at a slight angle through the subfloor into the joist. This method avoids drilling through the finished floor above.
Can humidity cause hardwood floors to squeak?
Yes, humidity levels affect wood movement. When indoor humidity swings, wood floors expand and contract, which can loosen fasteners and create new gaps between boards and joists. In dry seasons, boards may shrink and rub against each other, causing squeaks. Maintaining indoor humidity between 35% and 55% year-round helps reduce seasonal movement. If squeaks appear only in winter or summer, humidity control may solve the problem without major repairs.
When should I call a professional for squeaky floor repairs?
Call a professional if the squeak persists after DIY fixes, if you notice sagging or soft spots, or if the squeak covers a large area. Squeaks accompanied by visible gaps, cupping, or structural movement may indicate subfloor or joist damage that requires expert assessment. Also, if you have a floating floor or a finished ceiling below, a pro can recommend the least invasive repair. A professional can diagnose the source and ensure the fix lasts without damaging your floors.