 listicle
Signs of Poor Hardwood Floor Installation
Table of Contents
- What Poor Hardwood Floor Installation Looks Like
- Visible Gaps and Spaces Between Boards
- Buckling, Warping, and Cupping in Hardwood Flooring
- Squeaking, Creaking, and Movement Underfoot
- Uneven Joints and Mismatched Board Alignment
- Hardwood Floor Acclimation Before Installation
- Hardwood Floor Installation Inspection Checklist
- Hardwood Floor Installation Problems and Solutions
- Frequently Asked Questions
Last Updated: October 4, 2026
What Poor Hardwood Floor Installation Looks Like
Poor hardwood floor installation creates problems that compound over time. Signs range from visible defects you can spot immediately to hidden issues that emerge months later.
Installation quality determines whether a floor lasts decades or fails within years. Improper subfloor preparation, incorrect acclimation, and careless workmanship cause wood to expand, contract, and shift unpredictably. Knowing what to look for helps you catch problems early.
Visible Gaps and Spaces Between Boards
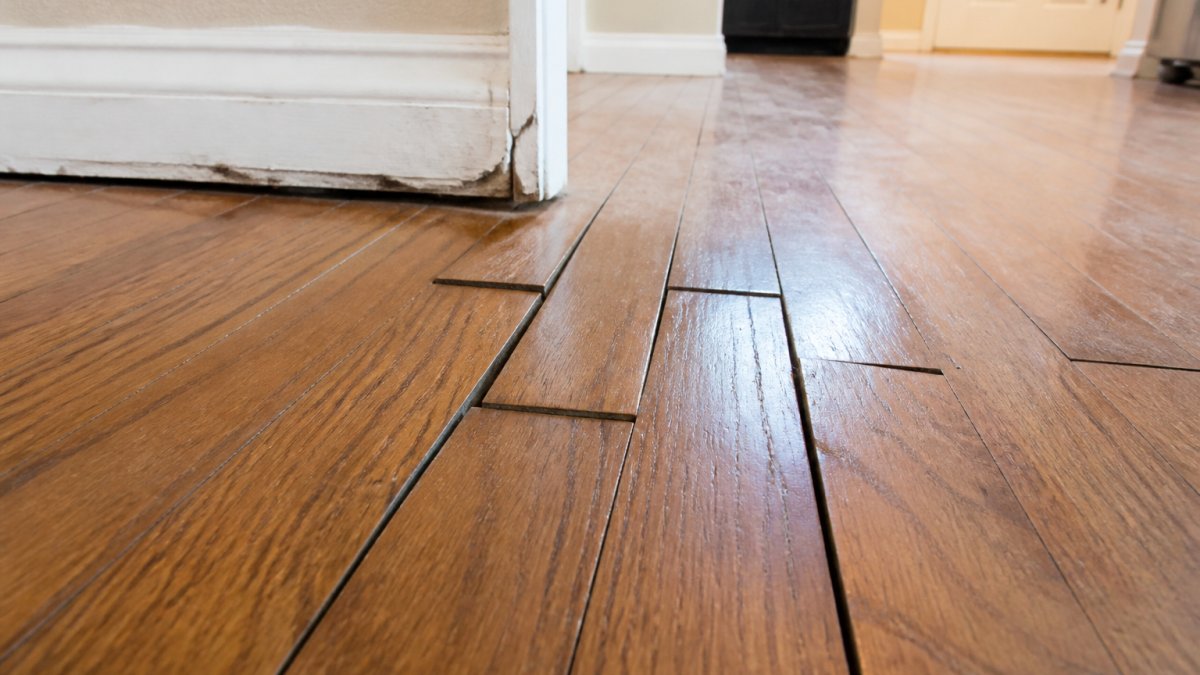
Gaps between floorboards signal poor hardwood floor installation. They appear when boards shrink after installation because the wood wasn't properly acclimated. If humidity adjustment isn't managed during installation, gaps emerge as boards adjust to your home's environment.
Small gaps during dry winters and closure in humid summers are normal. But gaps wider than 1/8 inch or year-round gaps indicate defects. Uneven spacing signals inconsistent board pressure or failure to account for wood movement.
Mixing wood from different batches or species with different expansion rates creates irregular gaps, a sign of poor planning.
Buckling, Warping, and Cupping in Hardwood Flooring
Buckling (boards lifting into humps), warping (twisting or bending), and cupping (edges curling upward) are serious signs of poor hardwood floor installation and indicate moisture problems.
Moisture is the primary culprit. Unsealed or damp subfloors cause wood to absorb water and expand unevenly. Poor hardwood floor installation often skips moisture barriers or allows inadequate drying time. Crowning (center rising) signals moisture imbalance from above.
Buckling and warping require identifying and fixing the moisture source first. The installer should have prevented this during acclimation and preparation.
Squeaking, Creaking, and Movement Underfoot
Squeaking and creaking indicate boards moving against the subfloor or each other, a sign of loose fasteners, shifted subfloor, or improper securing during installation.
Movement underfoot suggests inadequate fastening or subfloor issues. Quality installation uses 2 fasteners per board, spaced appropriately. Movement indicates fasteners weren't driven properly or the subfloor is unstable.
Excessive or immediate squeaking after installation points to defects. The installer should have used proper fastening and ensured a level, solid subfloor.
Uneven Joints and Mismatched Board Alignment
Uneven joints create visible steps or lips where boards sit at different heights. This occurs when the subfloor is uneven or boards aren't seated firmly. Mismatched alignment indicates poor planning.
Quality installations maintain consistent board stagger and ensure flush seating. Lips, ridges, or crooked joints indicate the installer didn't prepare the subfloor or verify flatness, a preventable sign of poor hardwood floor installation.
Hardwood Floor Acclimation Before Installation
Acclimation allows wood to adjust to your home's humidity and temperature before installation. This critical step is often skipped in poor hardwood floor installation. If boards are installed before acclimating, they'll expand or contract after installation, creating gaps, buckling, or cupping.
What Proper Acclimation Requires
Proper acclimation typically requires 3-7 days of the wood sitting in the space where it will be installed, with the room's heating and cooling systems running normally. During this time, the wood's moisture content should stabilize to match the environment. The target is for the wood's moisture content to fall within 2-4 percentage points of the subfloor's moisture content. For most residential spaces, this means the wood should reach a moisture content between 6 and 12 percent, depending on your region's climate.
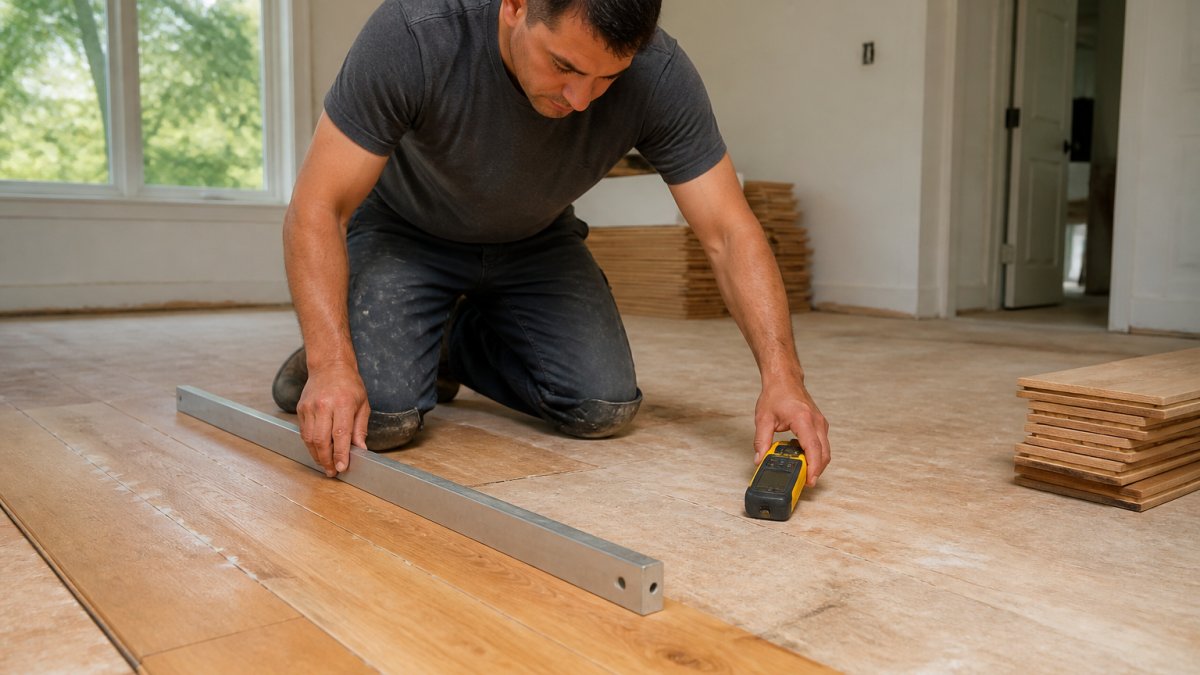
A quality installer will measure moisture content using a wood moisture meter, a handheld device that costs $30-$150 and provides a reading in seconds. The installer should test multiple boards from different parts of the shipment and document the readings. If the readings show the wood is still 2-3 percentage points higher than the subfloor, acclimation isn't complete, and installation should be delayed.
The room's temperature and humidity during acclimation should match what you expect year-round. If the installer acclimated the wood in an unheated garage in winter and then installed it in a climate-controlled home, the wood will still shift after installation. The acclimation space must be representative of the final installation environment.
Red Flags That Acclimation Was Skipped or Rushed
- Flooring delivered and installed within 24 hours. This is almost never adequate acclimation.
- No moisture meter readings provided. A professional installer should offer to show you the before and after moisture content of the wood.
- Wood stored outside or in an uncontrolled space. The acclimation area must have climate control similar to the finished room.
- Installer refuses to delay installation. Pressure to install immediately, especially during dry seasons or after humid periods, is a warning sign.
- No documentation of acclimation time. A quality installer will note the acclimation dates on the work order or contract.
Normal Seasonal Movement vs. Acclimation Failure
It's important to distinguish between normal seasonal wood movement and defects caused by poor acclimation. After installation, hardwood floors naturally expand and contract slightly with seasonal humidity changes. Small gaps (under 1/8 inch) that appear in winter and close in summer are normal. However, if gaps appear within the first few weeks after installation, or if they're wider than 1/8 inch and don't close seasonally, acclimation was inadequate.
Similarly, minor cupping or crowning that develops over a season and reverses is often normal; severe buckling or persistent warping within weeks of installation points to acclimation or moisture barrier failure, not normal wood movement.
Hardwood Floor Installation Inspection Checklist
A systematic inspection during and after installation catches defects before they become permanent problems. Use this checklist to evaluate the quality of the work and hold your installer accountable. The key is measuring and documenting findings so you have objective evidence if disputes arise.
What to Check During Installation
Before the installer finishes, verify these critical points:
Subfloor Preparation:
- Subfloor is clean, dry, and level. Use a straightedge (a 6-foot level or straight board) to check flatness. The subfloor should not deviate more than 3/16 inch over 10 feet, per industry standards. Mark any high or low spots with tape.
- Moisture barrier or underlayment is installed correctly with no gaps, tears, or wrinkles. Seams should overlap by at least 6 inches and be taped.
- Subfloor moisture content is measured and documented. It should be between 8 and 13 percent for most regions. Ask the installer to show you the moisture meter readings.
Wood Acclimation:
- Wood has been acclimating in the space for at least 3-5 days with heating and cooling systems running.
- Moisture content of the flooring wood is measured and documented. It should be within 2-4 percentage points of the subfloor moisture content.
- Wood is stored flat on spacers, not leaning against walls or stacked vertically.
Installation Technique:
- Boards are being laid with consistent stagger (end joints offset by at least 6 inches between rows) and proper spacing. Joints should not align vertically across more than two consecutive rows.
- Expansion gaps (typically 1/2 inch for solid hardwood, 1/4 inch for engineered) are maintained around the perimeter, at doorways, and around fixed objects like posts.
- Fasteners are being driven fully and are spaced appropriately. For nail-down installation, fasteners should be placed every 8-10 inches along the length of each board and every 2-3 inches at the ends. For glue-down, the adhesive should be applied in a consistent pattern with no voids.
- Boards sit flush with each other with no visible lips or steps. Run your hand across joints, you should not feel a ridge.
- If sanding is being performed, dust containment is in place and the floor is sanded in the direction of the grain.
What to Inspect After Installation
After installation is complete, walk the entire floor systematically and check for:
Visual and Tactile Defects:
- No gaps wider than 1/8 inch between boards (except at expansion perimeter, where gaps should be visible and consistent).
- No visible warping, cupping, or buckling. Sight along the floor from a low angle to detect waves or humps.
- All joints are flush and aligned properly. Run your hand across seams; you should not feel a lip.
- Finish is uniform with no dull spots, dust, drips, or bare wood.
- Trim and transitions are installed cleanly with no gaps or misalignment.
Movement and Sound:
- No squeaking or excessive movement when you walk. Some slight flex is normal in engineered or floating installations; nail-down solid hardwood should feel very solid.
- No creaking or popping sounds as the floor settles.
Moisture and Environmental:
- Humidity in the room is stable and appropriate (typically 30-50 percent relative humidity). Use an inexpensive hygrometer to verify. Extreme humidity swings will cause continued movement.
- No visible signs of moisture damage, staining, or discoloration.
Documentation and Next Steps
Take dated photos of the entire floor, close-ups of any defects, and photos of the moisture meter readings and straightedge checks. Write down the installer's name, company, date of installation, and any verbal commitments about warranty or repairs. Keep all receipts and contracts.
If you find defects, document them in writing with photos and contact the installer immediately. Quality installers stand behind their work and will address problems within the warranty period (typically 1-5 years, depending on the contract). If the installer refuses to address defects or disputes your findings, you have dated evidence to support a claim or to hire another contractor for remediation.
Hardwood Floor Installation Problems and Solutions
Common problems require different solutions depending on their severity and cause. Some issues can be repaired; others require replacement of affected boards or sections.
Gaps between boards: If gaps are minor and seasonal, they're normal. If they're persistent or wide, the installer should have acclimated the wood longer.
Buckling and cupping: These require identifying and fixing the moisture source first. If the subfloor is wet, it must dry completely before repairs begin. Affected boards may need to be replaced.
Squeaking: Squeaking can sometimes be fixed by tightening fasteners from below or injecting shims under loose areas. If the subfloor itself is unstable, larger repairs are needed.
Uneven joints: If joints are severely uneven, affected boards need to be removed and reinstalled. Minor unevenness can sometimes be sanded down, but this risks damaging the finish.
Moisture problems: These are the hardest to fix because the source must be identified and eliminated. This might involve fixing basement leaks, improving ventilation, or installing moisture barriers.
When poor hardwood floor installation creates problems, the installer should be responsible for repairs under warranty. Document everything with photos and written descriptions.
Freddie Sanchez Hardwood Floors handles each project with attention to proper acclimation, subfloor preparation, and fastening standards. If you're dealing with problem flooring or planning a new installation, get a free quote.
Hardwood floor problems often trace back to installation shortcuts. Whether you're evaluating existing floors or planning a new installation, knowing what to look for helps you avoid costly mistakes.
Frequently Asked Questions
How can you tell if hardwood floors were installed poorly?
Poor hardwood floor installation shows itself through visible gaps between boards, uneven joints, squeaking or movement underfoot, buckling or cupping, and misaligned board layouts. Check for gaps wider than 1/8 inch, boards that don't sit flat, or areas where floorboards shift when you walk. Moisture staining or finish defects also signal installation problems. A professional inspection can confirm whether issues stem from installation defects or normal seasonal movement.
What is the Rule of 3 for flooring?
The Rule of 3 refers to acclimation standards for hardwood flooring: wood should acclimate for at least 3 days in the room where it will be installed, at the temperature and humidity conditions it will experience long-term. Some species and thicker boards may require 5-7 days. Proper acclimation prevents the wood from expanding or contracting excessively after installation, which causes gaps, buckling, and cupping. Skipping or rushing acclimation is a common installation mistake.
How long should hardwood sit in the house before installing?
Hardwood flooring should acclimate for a minimum of 3 days before installation, though 5-7 days is often recommended depending on the wood species and board thickness. The wood must adjust to the room's temperature and humidity levels, typically 35-55% relative humidity and 60-80°F. Acclimation allows the material to reach equilibrium so it won't expand or contract excessively after installation. Installers who skip acclimation or rush the process create conditions for gaps, buckling, and other defects.
Can poorly installed hardwood floors be repaired without replacing them?
Some installation defects can be repaired without full replacement. Minor gaps can be filled with wood filler or putty matched to your floor color. Squeaking often resolves with fastener adjustments or adding screws from below the subfloor. Uneven joints may be sanded and refinished if the damage is shallow. However, severe buckling, cupping, moisture damage, or widespread misalignment often requires board replacement or complete reinstallation. A professional inspection determines whether repair or replacement is necessary and cost-effective.