 how-to
Can You Install Hardwood Over Existing Tile?
Table of Contents
- Can You Install Hardwood Over Existing Tile? The Short Answer
- Choosing Between Solid and Engineered Hardwood for a Tile Subfloor
- Inspecting and Preparing Your Existing Tile: A Step-by-Step Checklist
- Moisture Testing and Subfloor Requirements Before You Start
- Floating Wood Floor Over Tile vs. Glue-Down and Nail-Down Methods
- Should I Remove Tile Before Installing Hardwood?
- Replacing Tile With Hardwood: Cost, Labor, and Timeline Comparison
- Scheduling Your Hardwood Installation Over Tile With Freddie Sanchez Hardwood Floors
- Frequently Asked Questions
Last Updated: November 3, 2026
Can You Install Hardwood Over Existing Tile? The Short Answer
Yes, you can often install hardwood over existing tile, but only when the tile is stable, flat, and level enough to support the new floor.
Hardwood is made from solid planks or layered engineered boards. Tile is hard, rigid, and often uneven, so it can't flex like a wood subfloor.
- Tile is firmly bonded with no loose, cracked, or hollow tiles
- The surface is flat within the tolerance your flooring manufacturer specifies
- Floor height works with your doors, baseboards, and appliances
If any of these fail, removing the tile is usually the safer path. The sections below walk through each check.
Choosing Between Solid and Engineered Hardwood for a Tile Subfloor
Engineered hardwood is generally the better match for a tile subfloor, though solid hardwood can work in some cases. Engineered boards use a cross-grain layer pattern that makes them more dimensionally stable when moisture or temperature shifts. For a side-by-side look at specific tests, see our hardwood floor moisture testing methods guide.
- Engineered hardwood handles small moisture changes better and is often approved for floating installation over tile
- Solid hardwood offers a thicker wear layer that can be refinished several times, but usually needs nailing or full adhesive bonding to a subfloor
- Engineered hardwood typically adds less height, helping with door clearance
Because the rules depend on the product, always check the manufacturer's installation instructions before you buy.
Inspecting and Preparing Your Existing Tile: A Step-by-Step Checklist
A careful inspection is the most important part of any tile-over installation. Plan a few hours to walk the entire floor, mark problem areas, and build a repair list before ordering materials.
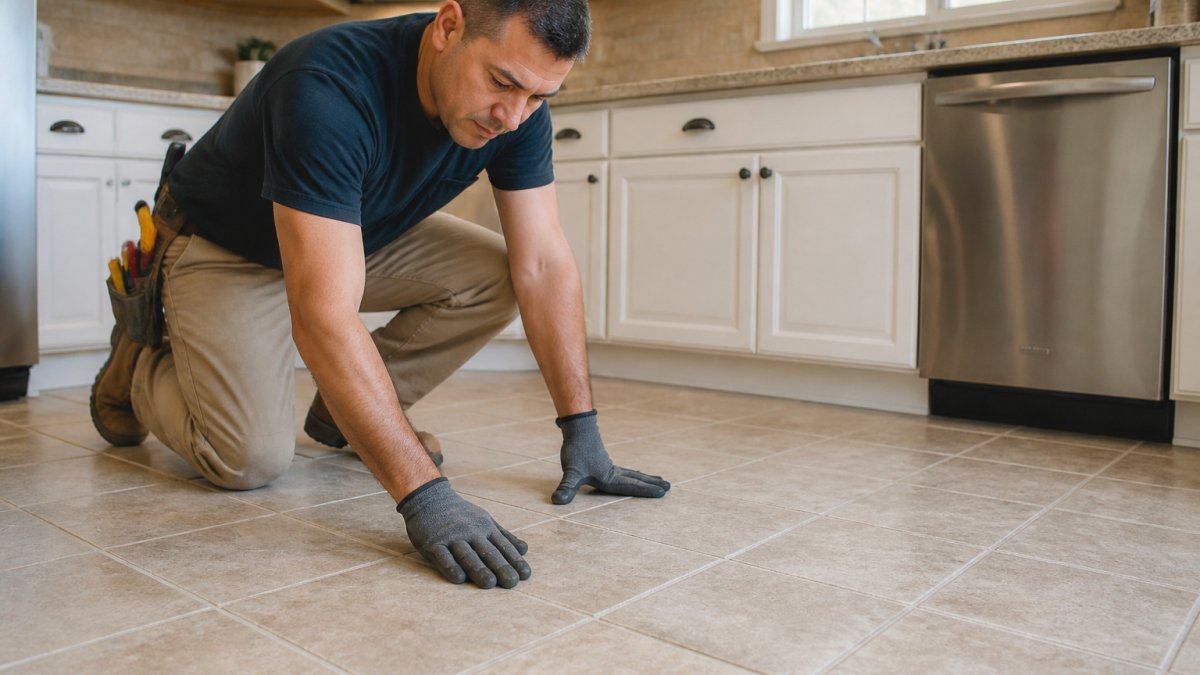
Checking for Loose, Cracked, and Uneven Tiles
Start by walking the floor in socks and listening for hollow spots. Then work through the floor section by section.
- Tap each tile with a rubber mallet or screwdriver handle. A hollow sound often means the tile isn't bonded to the mortar below.
- Press on tile edges to check for movement. Any rocking or give means the tile must be re-secured or removed.
- Look for cracked or chipped tiles and mark each with painter's tape.
- Check grout joints for crumbling, gaps, or missing grout, which can let moisture travel beneath the tile.
- Run a long straightedge across the floor in several directions to find high and low spots.
- Ignoring a few hollow tiles, which often spread into larger failures under a new floor
- Skipping the straightedge test, which hides uneven areas that show up later as gaps or squeaks
- Filling deep low spots with thin leveling compound, which can crack under foot traffic
Measuring Floor Height and Door Clearance
Adding a hardwood layer raises the floor, and that change can affect how doors swing and how appliances sit. Measure before you start.
- Measure the current height from the tile surface to the bottom of each door
- Add the thickness of the new hardwood, underlayment, and any moisture barrier
- Check door clearance so doors still swing freely over the new surface
Many doors need trimming or replacement when the floor rises, so get these measurements in writing before you commit.
Moisture Testing and Subfloor Requirements Before You Start
Moisture is one of the most common reasons a floor fails. Tile is not a moisture barrier, because water can pass through grout joints and reach the layers below.
Follow these steps before installation:
- Test the tile surface with a moisture meter designed for concrete or wood, recording readings in several rooms
- Check the subfloor from below if you have crawl space access, or look for water stains and musty odors
- Identify any water source such as a leaking pipe, poor drainage, or basement seepage
- Fix moisture problems first. No flooring should go down over an active moisture source.
- Confirm the subfloor is structurally sound and can support the added weight and foot traffic
Keep moisture readings in your project file, since installers and warranty providers may ask for them.
Floating Wood Floor Over Tile vs. Glue-Down and Nail-Down Methods
There are three common ways to install hardwood, and each behaves differently over tile. The right choice depends on the flooring product, the tile's condition, and how much height you can add.
The Three Methods at a Glance
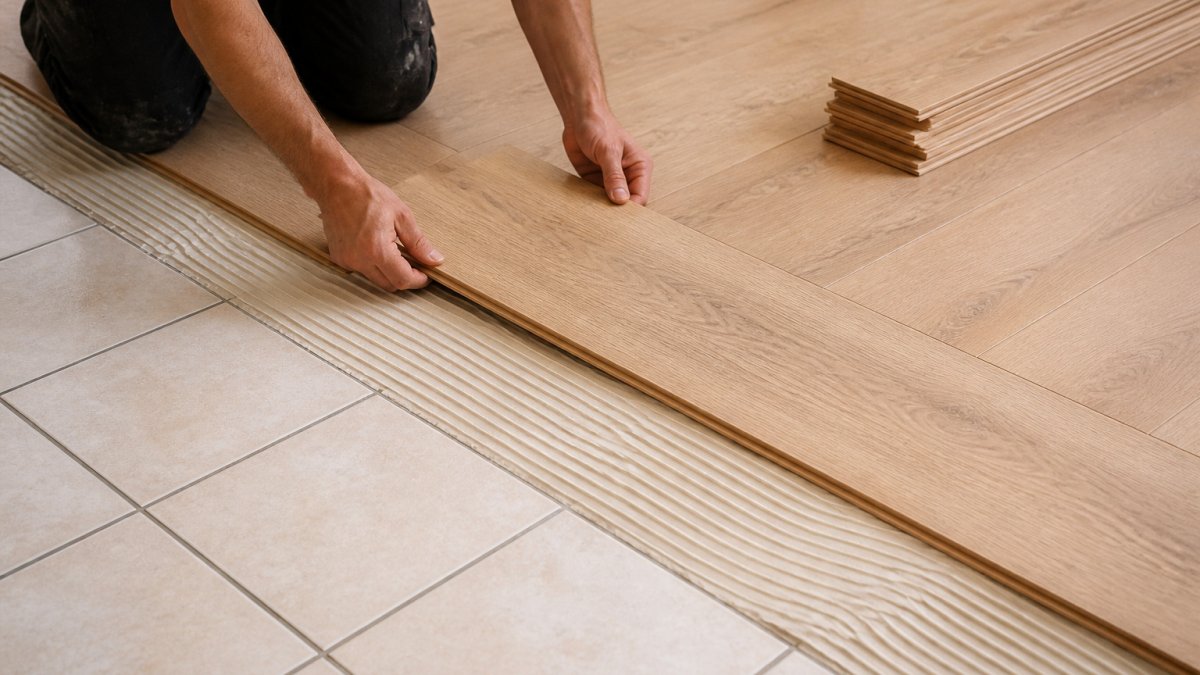
- Floating installation means planks click or lock together and rest on an underlayment without being fastened to the tile. The floor moves as a single sheet, so it needs a perimeter gap (usually about 1/4 to 3/8 inch, hidden by baseboard or shoe molding) and a flat surface within the manufacturer's tolerance. This is usually the most common choice over tile because it avoids penetrating the tile and is easiest to reverse.
- Glue-down installation bonds planks to the tile with adhesive. Over tile, it needs an adhesive rated for both the tile and the wood product, a scuffed or primed surface for grip, and a very flat floor. It is harder to reverse and can trap moisture if the tile or subfloor is damp.
- Nail-down installation drives cleats or staples through planks into a wood subfloor. Because tile cannot hold fasteners normally, nail-down is generally not used directly over tile. It becomes viable only after the tile is removed and a wood subfloor is exposed or installed.
Decision Framework: Which Combination Works
- Engineered hardwood + floating + stable, flat tile, The most common and lowest-risk combination. Confirm the product's instructions list tile as an approved substrate.
- Engineered hardwood + glue-down + very flat, well-bonded tile, Workable when the manufacturer approves adhesive over tile and you use a compatible adhesive. This adds less height than floating with thick underlayment, which helps at doors.
- Solid hardwood + floating, Rarely approved. Solid planks are thicker and less dimensionally stable, and most manufacturers don't allow floating solid hardwood over tile. Check the specific product first.
- Solid hardwood + nail-down, Requires removing the tile and installing or exposing a wood subfloor. This is a removal project, not a tile-over project.
- Any product + tile that is loose, cracked, or out of flatness, Stop and repair or remove the tile first. No method compensates for a failing base.
A simple rule of thumb: if you want to keep the tile, lean toward engineered floating or engineered glue-down. If you want solid hardwood, plan on removal and a wood subfloor.
Matching the Method to Your Tile Condition
- Firmly bonded, flat tile with sound grout, Floating or glue-down engineered can both work. Floating is more forgiving of minor surface variation; glue-down demands a flatter floor.
- A few hollow or cracked tiles, Repair or replace those tiles first, then reassess. A floating floor can bridge small isolated defects, but a glue-down bond will fail over a loose tile.
- Widespread hollow tiles or large low spots, Removal is usually safer, because leveling compound over a failing tile bed tends to crack under traffic.
Watch out: A product labeled "floating" is not automatically approved over tile. Installing over an unapproved substrate can void the warranty even if the floor looks fine at first.
Height and Transition Consequences by Method
- Floating adds plank thickness plus underlayment thickness. A typical engineered plank plus underlayment can add roughly 1/2 inch or more, depending on products.
- Glue-down adds mostly plank thickness plus a thin adhesive layer, usually less height than floating.
- Nail-down over a new subfloor adds the subfloor, plank, and any underlayment, making it the tallest option and almost always requiring door and transition adjustments.
Measure the total added height for your chosen combination before you commit, and check it against door swing clearance, stair riser height, and the transition at each doorway.
What to Confirm Before You Choose
- The product's installation instructions list tile as an approved substrate for the method you plan to use
- The warranty covers installation over tile
- The adhesive or underlayment is compatible with both the tile and the wood product
If you are unsure which combination fits your tile, an on-site evaluation is the fastest way to get a straight answer.
Should I Remove Tile Before Installing Hardwood?
Removing tile is the safer choice in several situations, even though it adds time and cost. Consider removal if:
- Tiles are cracked, loose, or hollow in many places
- The floor has large low spots that require heavy leveling
- Moisture problems exist beneath the tile
Removal allows you to inspect the subfloor directly, correct any structural issues, and install the hardwood on a stable base. It also gives you the most control over final floor height.
Replacing Tile With Hardwood: Cost, Labor, and Timeline Comparison
Installing hardwood over tile is often less expensive and faster than removing tile first, but final cost depends on many factors. Costs depend on the project, so request a quote for figures tailored to your home.
The Main Cost Drivers
- Flooring material, Engineered and solid hardwood are priced per square foot, with a wide spread between budget and premium products. Material is usually the largest line item.
- Underlayment or adhesive, Floating floors need underlayment; glue-down needs adhesive. Modest per-square-foot costs that add up over a large area.
- Surface preparation, Patching, leveling compound, and repairing loose or cracked tiles add labor. The worse the tile condition, the more this line grows.
Installing Over Tile vs. Removing Tile: Labor Comparison
- Installing over tile involves less demolition and debris, shortening the project. Labor concentrates on inspection, surface prep, and installation, with no hauling or disposal phase.
- Removing tile adds demolition, disposal, and subfloor repair, increasing labor time. Removal also opens the door to surprises like damaged subfloor or hidden moisture, which can extend the timeline.
- Repairs to uneven or damaged tile can add time and cost to the tile-over approach, so poor-condition tile narrows the savings.
The tile-over approach saves on demolition and disposal but may spend some of that savings on surface preparation and height adjustments. Removal spends more upfront on labor and disposal but gives you a clean, inspectable subfloor.
Timeline: What to Expect
- Installing over tile, Inspection and prep (often a day or more depending on repairs), installation, and any adhesive cure time. Floating floors have little or no cure time; glue-down needs adhesive to cure before heavy traffic.
- Removing tile, Demolition, disposal, subfloor inspection and repair, then installation. Removal typically adds days, and subfloor repairs can extend it further.
- Door and trim work, Trimming doors and adjusting baseboards can run parallel with installation but should be scheduled before the final walkthrough.
A well-planned project finishes faster because the inspection stage catches problems early. Ask for a written timeline that lists each stage, including preparation, installation, and cure time for any adhesives.
How to Compare Bids Fairly
- Ask each bidder to itemize material, underlayment or adhesive, surface prep, trim and door work, and disposal separately.
- Confirm whether the quote assumes tile removal or tile-over, and whether it includes disposal fees.
- Ask what happens if hidden subfloor damage is found after removal, and how that changes the price.
Watch out: A low bid that skips surface preparation or disposal is not a real comparison.
When you are ready, request a free quote from Freddie Sanchez Hardwood Floors. We will review your tile, measure your floor height, and recommend the method that fits your home and budget.
The table below compares the main cost and timing differences between installing hardwood over tile and removing tile first, as the article describes them.
| Approach | Main cost driver | Timeline effect |
|---|---|---|
| Install over tile | Surface prep and height adjustments | Less demolition, shorter project |
| Remove tile first | Demolition, disposal, subfloor repair | Adds days; repairs can extend it |
| Floating floor | Underlayment per square foot | Little or no cure time |
| Glue-down floor | Adhesive per square foot | Adhesive must cure before heavy traffic |
| Poor-condition tile | Repairs add labor | Narrows the savings of tile-over |
Scheduling Your Hardwood Installation Over Tile With Freddie Sanchez Hardwood Floors
We aim to keep communication open from start to finish so you know what is happening in your home.
Here is what to plan before you schedule:
- Complete the tile inspection and document every problem area with photos
- Fix any moisture source before the flooring date is set
- Confirm door and appliance clearances in writing
When you are ready, request a free quote from Freddie Sanchez Hardwood Floors. We will review your tile, measure your floor height, and recommend the method that fits your home and budget.
Frequently Asked Questions
Can you install hardwood on top of tile?
Yes, in many homes you can install hardwood over existing tile, but only when the tile is firmly bonded, flat, and free of cracks. Floating installations are the most common approach because they do not require nailing or gluing into the tile. Loose or cracked tiles should be secured or replaced first, since any movement underneath will eventually show up in the wood. Expect the finished floor to be higher, so check door clearances, appliance fit and transitions before you begin. A professional inspection can confirm whether your tile is stable enough.
Can you install engineered hardwood over tile?
Engineered hardwood is often a good choice over tile because its layered core resists expansion and movement better than solid planks. Most manufacturers allow floating or glue-down installation over a properly prepared, level tile surface, but the exact requirements vary by product. Check the manufacturer's installation instructions and warranty before you start, since some warranties are void if the floor is installed over tile. Confirm that the tile is clean, flat within the manufacturer's tolerance and securely bonded.
Is it better to remove tile before installing hardwood?
Removing tile is usually the safer option when tiles are cracked, loose or unevenly set, when the subfloor is damaged, or when the moisture level is high. It also makes it easier to correct the floor height problem and avoid transition issues at doorways. Installing over tile is a reasonable choice when the tile is stable and level and your floor-height clearances allow it. Removal adds labor and cost, so weigh it against the condition of the tile and the subfloor underneath.
How much does it cost to replace tile with hardwood?
Pricing depends on the size of the room, the tile removal method, subfloor repairs, the hardwood product you select and local labor rates. Because costs vary widely, the most accurate figure comes from a written estimate after an on-site inspection. Ask for an itemized estimate that separates tile removal, subfloor work, materials and installation so you can compare options fairly.