 how-to
How to Transition Hardwood Floors Between Different Levels
Quick Summary
Start by measuring the height difference between the two floors at the doorway, since that number determines the right hardwood floor transition profile. Small gaps under 1/4 inch may need a flush or beveled reducer, medium gaps need a reducer or T-molding, and gaps over 3/4 inch call for a threshold or ramp.
- Measure the gap from the top of the finished hardwood to the adjacent floor using a straightedge.
- Gaps from 1/4 to 3/4 inch usually need a reducer strip or T-molding.
- Gaps over 3/4 inch call for a threshold, ramp, or subfloor adjustment.
- Leave the expansion gap the flooring manufacturer specifies at each hardwood edge.
- Never fasten through the surface of a floating floor; attach the profile to the subfloor instead.
Table of Contents
- Measuring the Height Difference Between Rooms
- Choosing a Floor Transition Strip for Your Height Difference
- Floor Transition Ideas for Different Heights
- Tile to Wood Floor Transition at Different Heights
- Preparing the Subfloor and Matching Floor Thickness
- Installing Each Transition Profile Step by Step
- Troubleshooting Gaps, Squeaks, and Lifting Strips
- Booking Your Transition Project with Freddie Sanchez Hardwood Floors
- Frequently Asked Questions
Measuring the Height Difference Between Rooms
Last Updated: November 7, 2026
Getting a hardwood floor transition right starts with one measurement. Before you buy a single strip, you need to know how far apart the two floors sit.
Here is the short version. Measure the height difference from the top of the finished hardwood in one room to the top of the adjacent floor. Use a straightedge across the doorway and a tape or level to read the gap.
Reading Small, Medium, and Large Height Differences
Height differences fall into three rough ranges. Each range points to a different fix.
- Small (under 1/4 inch): Often handled by a flush or slightly beveled reducer.
- Medium (1/4 inch to 3/4 inch): Usually needs a reducer strip or a T-molding.
- Large (over 3/4 inch): Typically calls for a threshold or a ramp, or adjustment of the subfloor.
Watch out: Do not guess at a large gap. A step that looks small can still trip someone, especially at night or in a hallway with foot traffic.
Choosing a Floor Transition Strip for Your Height Difference
Once you know the gap, pick a transition strip that matches it. If the gap is in existing floors near a transition, see how to fix gaps in existing hardwood floors for a dedicated guide. A good strip covers the seam, protects the edges of both floors, and lets the wood move with the seasons. The decision comes down to three inputs: the measured height difference, the traffic the doorway sees, and whether either floor is a floating assembly that needs room to move.
A Measured Decision Guide for Height Differences
Use the number you wrote down at the doorway to narrow the field before you shop. Always confirm against the specific profile's published dimensions, because trim profiles vary by manufacturer.
- 0 to 1/8 inch: A flush T-molding or a flat seam binder sits nearly level with both floors. Best for two hardwood floors of equal thickness or a hardwood-to-engineered match.
- 1/8 to 1/4 inch: A slightly beveled reducer or a low-profile T-molding works. This is the range where a flat strip still reads as seamless underfoot.
- 1/4 to 1/2 inch: A standard reducer strip is the usual choice. It slopes from the higher floor down to the lower one over a short run.
Watch out: A gap that measures 3/4 inch at the doorway can read as much larger once you account for the thickness of the strip's base and any adhesive or fastener head. Dry-fit the profile before you commit to a length.
Reducer, T-Molding, Threshold, and Ramp Profiles
- Reducer strip: Steps down from a higher floor to a lower one. Best for medium gaps, roughly 1/4 to 3/4 inch. The slope should be gradual enough that a foot rolls over it rather than catching.
- T-molding: Joins two floors of equal height. Used in doorways between rooms with the same thickness. The center leg bridges the gap between the two floor edges.
- Threshold: A raised bar that covers a larger gap, often at exterior doors or between very different materials. Some thresholds include a weather seal; interior versions are usually simpler.
Matching the Profile to the Floor Type
Material matters as much as height. Solid hardwood moves more with seasonal humidity than engineered hardwood, and a floating floor moves as a single sheet.
- Solid hardwood to solid hardwood: Leave the expansion gap the flooring manufacturer specifies at each edge, and choose a profile whose base covers that gap without pinning the boards.
- Hardwood to tile: Tile is dimensionally stable; wood is not. The profile should fasten to the tile side or the subfloor, not clamp the wood edge.
- Hardwood to carpet: A carpet-to-hardwood transition usually uses a tack-down strip or a z-bar that grips the carpet edge and overlaps the wood. Height differences here are often driven by carpet pile and pad thickness.
Choose a profile in the same finish as your hardwood where you can. A matching color makes the seam look planned rather than patched, and a prefinished profile saves a staining step on site.
The measured gap points to a profile, and the table below pairs each height range with the strip the article recommends.
| Height difference | Recommended profile | Note |
|---|---|---|
| 0 to 1/8 inch | Flush T-molding or flat seam binder | Near level with both floors |
| 1/8 to 1/4 inch | Beveled reducer or low-profile T-molding | Still reads as seamless underfoot |
| 1/4 to 1/2 inch | Standard reducer strip | Slopes down over a short run |
| 1/2 to 3/4 inch | Taller reducer or beveled threshold | Check slope angle to avoid catching shoes |
| 3/4 inch and above | Ramp or threshold plus subfloor adjustment | Treat as a step for trip safety |
Floor Transition Ideas for Different Heights
The right floor transition idea depends on how the two rooms are used. A few common approaches work well across most homes:
- Use a flush T-molding when the floors sit at the same height.
- Use a reducer when a tiled kitchen sits higher than the hardwood living room.
- Use a ramp in a hallway where wheelchairs or walkers pass often.
A common mistake is choosing a flat threshold for a large gap. It looks clean, but it creates a lip that catches shoes and walkers. Match the profile to the step, not just the look you want.
Tile to Wood Floor Transition at Different Heights
Tile and hardwood are the most common pairing in homes, and they rarely sit at the same height. Tile is often thicker once the mortar and backer board are included.
Plan for this before the tile goes in when you can. To check whether hardwood can go over the existing tile at that height, see whether you can install hardwood over existing tile.
Hardwood and tile move differently. Tile barely expands, while wood moves with humidity. Leave the expansion gap the profile manufacturer specifies, and do not lock the wood tight against the tile edge.
Preparing the Subfloor and Matching Floor Thickness
Good transitions depend on a flat, stable subfloor. If the subfloor dips or rises, the transition strip will rock or crack.
Check the subfloor with a long straightedge before installation. You can also review hardwood floor moisture testing methods to check subfloor moisture as part of assessing the room. For the full preparation process, read subfloor preparation for hardwood installation.
- Confirm the subfloor is flat within the tolerance your flooring manufacturer lists.
- Dry out any moisture problem before laying wood.
- Account for underlayment thickness in your height calculation.
Installing Each Transition Profile Step by Step
Installation steps vary by profile, and the differences matter more than the similarities. The general sequence, clean, dry-fit, mark, fasten, check, finish, holds, but the tools and fastening method change with the profile. Below are the profile-specific steps, followed by the shared sequence.
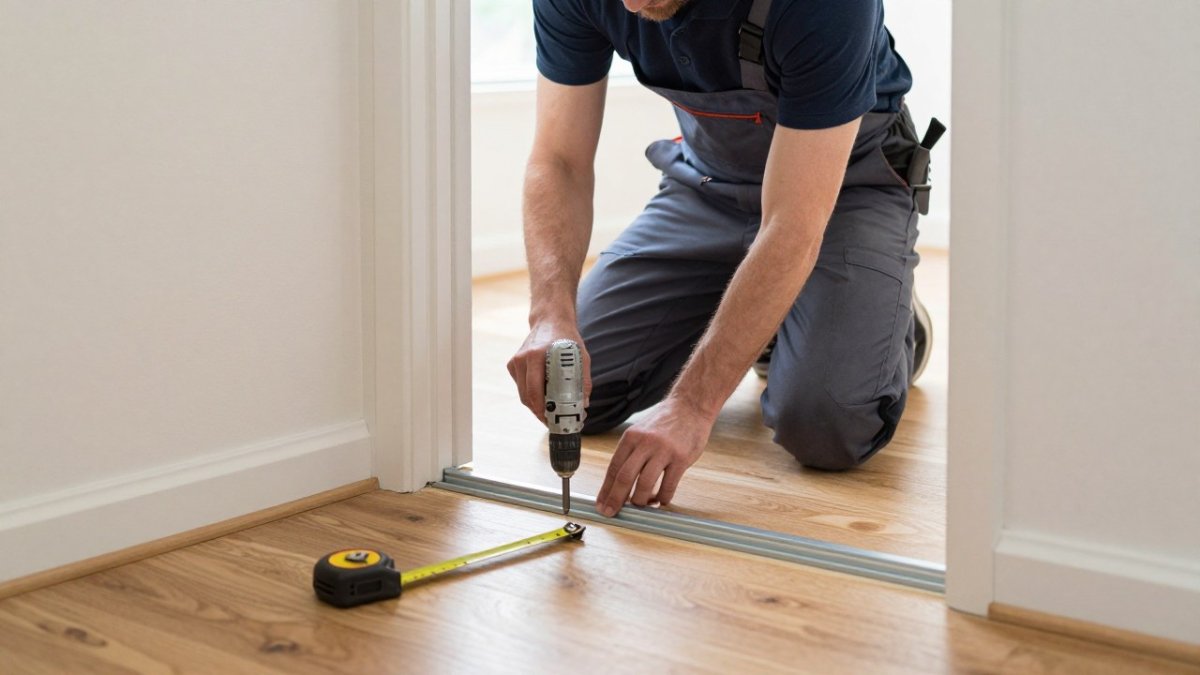
Tools and Materials to Have on Hand
- Tape measure, straightedge or 4-foot level, and a pencil
- Fine-tooth saw or miter saw for trimming the profile
- Drill with a driver bit and screws sized for the profile and subfloor
Reducer Strip
- Measure the doorway width at three points and cut the reducer to the shortest measurement, then trim the ends square.
- Dry-fit the reducer so its high edge sits flush with the higher floor and its low edge meets the lower floor without a lip.
- Fasten through the base flange into the subfloor, not through the finished face. Predrill to avoid splitting.
- Where the reducer meets the higher wood floor, leave the expansion gap the flooring manufacturer specifies and let the reducer's lip cover it without pinning the boards.
Watch out: A reducer fastened tight against the higher floor's edge can squeak or crack as the wood moves. The lip should cover the gap, not compress it.
T-Molding
- Cut the T-molding to the doorway width and dry-fit it so the center leg drops into the gap between the two floors.
- Confirm the top surface sits flush with both floors. If one side sits proud, the subfloor or the floor thickness is off, and a different profile may be the better fix.
- Fasten the center leg to the subfloor with the recommended screws or adhesive, keeping fasteners clear of both floor edges.
- Check for rocking across the full length before finishing.
Threshold
- Set the threshold in place and check that it covers the gap and any old fastener holes or adhesive residue.
- Mark fastener locations and predrill through the threshold.
- Fasten into the subfloor, not into either finished floor. At exterior doors, follow the door manufacturer's guidance for sealing and for the sill.
- Seal or caulk the edges where the threshold meets each floor if the manufacturer calls for it.
Ramp
- Measure the height difference and the doorway depth to confirm the ramp's slope is gradual enough for the traffic it will see.
- Dry-fit the ramp and check that the leading edge meets the lower floor without a lip and the top edge meets the higher floor flush.
- Fasten through the ramp's base into the subfloor at the recommended spacing, keeping fasteners away from both floor edges.
- Walk the ramp and roll a wheeled load across it if accessibility is the reason for the ramp. Any rocking or lip means the base needs shimming or the ramp needs re-seating.
The Shared Sequence
- Clean the seam area. Remove debris, old adhesive, and loose trim.
- Dry-fit the profile. Confirm the length and the fit against both floors.
- Mark the fastener points. Stay clear of the floor edge so the wood can expand.
- Fasten the profile. Use screws or a manufacturer-approved adhesive, depending on the strip.
- Check for rocking. Press gently on the strip. It should sit flat with no movement.
- Trim and finish. Cut the ends square and touch up the finish if needed.
Installing the first board in the same direction as the rest of the room, working from one fixed starting point, helps keep the layout consistent across the doorway.
Troubleshooting Gaps, Squeaks, and Lifting Strips
Most transition problems show up within the first year. The usual culprits are gaps, squeaks, and lifting strips.
- Gaps: Often caused by dry air or a loose fastener. Check humidity and re-secure the profile.
- Squeaks: Usually come from loose subfloor boards or fasteners. Screw the squeaky spot down into the subfloor. For a proven step-by-step fix, see how to fix squeaky hardwood floors.
- Lifting strips: Typically mean the adhesive failed or the wood moved too much. Remove the strip, clean the surface, and reinstall it with the correct clearance.
If a fix does not hold, consider calling a qualified flooring professional before the damage grows.
Booking Your Transition Project with Freddie Sanchez Hardwood Floors
Transitions look simple, but they depend on accurate measuring, the right profile, and careful installation. Pricing depends on the size of the job, the materials, and the timeline, so the best next step is to request a free quote tailored to your home.
Frequently Asked Questions
How do you transition hardwood floors between rooms?
Start by measuring the height difference between the two floors at the doorway. For a small difference, a reducer or T-molding usually works. For larger differences, a threshold or ramp is needed. Run the hardwood boards in the same direction across the doorway when possible, and fasten the transition profile to the subfloor, not just the finished floor, so the strip stays secure as the wood expands and contracts with seasonal humidity.
How much height difference can a floor transition strip cover?
Most reducer strips handle a difference of about 1/4 inch or less, while T-molding is typically used where two floors are at nearly the same height. Differences larger than that generally call for a threshold or a ramp, and some floors need the subfloor adjusted before any strip is installed. Check the manufacturer's stated height range for each profile before you buy, since the limits vary by product.
What type of transition strip works best for different floor heights?
Reducer strips work well when one floor sits slightly lower than the other, because they slope down gradually. T-molding fits between two floors of similar height, and threshold profiles suit doorways where one floor is noticeably higher. Choose the profile that matches your measured height difference, and confirm the material, such as wood, aluminum, or vinyl, is compatible with both flooring types.
How do you transition hardwood flooring to tile at a different height?
Tile and hardwood often sit at different heights because tile usually requires a thicker setting bed. A reducer strip or threshold is the usual solution. Measure the difference from the top of the tile to the top of the hardwood, then select a profile that closes the gap. Because tile and wood expand differently, leave a small expansion gap at the edge of the hardwood and fasten the profile so it can move slightly without cracking.