 how-to
How to Fix a Squeaky Subfloor: Best Tools for the Job
Last Updated: November 4, 2026
Quick Summary
The best tools for repairing a squeaky subfloor are a cordless drill with a clutch, a joist finder, and screws matched to your floor covering. Counter-snap screws suit carpet and vinyl, while coarse wood screws suit hardwood. Add construction adhesive and wood shims when the squeak comes from a loose panel.
- A joist finder locates the framing so screws bite into the joist, not thin air.
- Use counter-snap screws for carpet and vinyl, since their heads break off below the surface.
- Hardwood needs coarse-thread wood screws driven through pilot holes to prevent splitting.
- Construction adhesive and wood shims work best from below on loose panels that screws alone cannot hold.
- Most 3/4-inch subfloors take a screw about 2 inches long; measure your floor thickness first.
Table of Contents
- Identifying the Source of Floor Squeaks Before You Buy Anything
- Essential Tools for Subfloor Repair and Why Each One Matters
- How to Use a Joist Finder and Mark Your Repair Points
- Choosing the Right Screw Length and Type for Your Floor
- Step-by-Step Installation of Repair Screws From Above and Below
- Building a Squeaky Floor Repair Kit for Hardwood, Carpet and Vinyl
- Booking a Professional Fix When DIY Is Not Enough
- Frequently Asked Questions
Identifying the Source of Floor Squeaks Before You Buy Anything
Most squeaky subfloors come from one of two problems: loose subfloor panels rubbing against joists, or nails and screws that have worked loose over time. Knowing which one you have tells you which tools to buy. Start by walking the floor slowly and marking each squeak with painter's tape. Ask a helper to step on the spot while you listen from below if you can reach the basement or crawl space.
A squeak that happens only when you walk in one spot usually points to a loose fastener. A squeak that moves across a wide area often means the subfloor is pulling away from the joists. Carpet can hide the sound, but the cause is the same. Marking every squeak before you spend money on supplies helps you buy only what the repair needs.
- Walk the room and mark each squeak with tape
- Note whether the sound comes from one spot or a wide area
- Check the basement or crawl space for loose nails or gaps
- Look for signs of moisture, since cupping can cause squeaks too
If the floor shows cupping or moisture damage, read our guide on why hardwood floors cup and how to fix it before you start. Moisture problems need more than screws.
Essential Tools for Subfloor Repair and Why Each One Matters
A basic repair needs fewer tools than most people expect, but the right tool set depends on three variables: floor covering, access from below, and whether the squeak is a loose fastener or a panel rubbing a joist. The table below maps each tool to the problem it solves and the floor types it suits, so you buy only what your repair actually requires.
| Tool | What It Solves | Best For | Typical Price Range (USD) |
|---|---|---|---|
| Cordless drill with clutch | Drives screws without stripping heads or cracking boards | All floor types | $60-$150 |
| Joist or stud finder | Locates framing under finished floor | All floor types; essential for carpet and vinyl | $20-$60 |
| Counter-snap screw kit with tripod | Drives and snaps heads below surface through carpet | Carpet, vinyl | $25-$45 |
| Wood screws (coarse and fine thread) | Bites into joist through subfloor | Hardwood, engineered wood, laminate | $8-$15 per box |
| Construction adhesive and caulk gun | Bonds subfloor to joist from below | All floor types; best when access from below exists | $6-$12 per tube |
| Wood shims | Fills gap between joist and subfloor | All floor types; from below only | $3-$8 per pack |
| Painter's tape and pencil | Marks squeaks and joist lines | All floor types | $5-$10 |
| Utility knife | Trims shims, clears debris | All floor types | $5-$15 |
| Moisture meter | Confirms whether cupping or swelling is the cause | Hardwood, engineered wood | $25-$60 |
A cordless drill with a clutch setting helps prevent overdriving, since the clutch slips when the screw seats.
A joist finder is the tool most often skipped and the one that causes the most failed repairs. A screw that misses the joist holds nothing and can crack the subfloor panel. Before you drive any fasteners, see our guide on subfloor preparation for hardwood installation, which explains how the subfloor should be prepared before screws go in. Electronic finders work through carpet and vinyl; for thick hardwood, confirm each mark by tapping or by measuring from a known reference such as a wall or floor register.
Counter-snap screws are a category, not a brand. They come with a tripod fixture that sets drive depth so the head snaps off just below the carpet pile. For hardwood and engineered wood, coarse-thread wood screws grip better in softwood joists, while fine-thread screws reduce splitting in dense species. Construction adhesive and shims are the from-below tools: adhesive bonds a loose panel to the joist, and shims fill a gap that screws alone cannot close.
Watch out: buying a counter-snap kit for a hardwood floor wastes money, because the snap-off head leaves a hole in the finish that needs filling. Match the fastener to the covering before you check out.
How to Use a Joist Finder and Mark Your Repair Points
A joist finder shows you where the framing sits under the floor. Run it slowly across the squeaky area, and mark the center of each joist with tape. Joists usually run 16 inches apart, but measure to confirm, because older homes can vary.
Once you find a joist, mark the line down the center. Then drive your fasteners along that line, not beside it. Mark each repair point clearly so you can work from above or below without guessing.
Watch out: a wrong mark sends the screw into the air beside the joist, where it holds nothing. Measure from a wall or a known reference point before you mark.
Choosing the Right Screw Length and Type for Your Floor
Screw length matters more than most people think. The screw must pass through the subfloor and bite into the joist, but not poke through the finished floor. For most 3/4-inch subfloors, a screw about 2 inches long works well, though you should measure your own floor's thickness first.
Use counter-snap screws for carpet and vinyl, since their heads break off below the surface. Hardwood needs a screw that will not split the boards, so pilot holes help. The best choice depends on your floor type:
| Floor Type | Screw Type | Typical Length | Notes |
|---|---|---|---|
| Hardwood | Coarse-thread wood screw | About 2 inches | Drill a pilot hole |
| Carpet | Counter-snap screw | About 2 inches | Head snaps off below surface |
| Vinyl | Fine-thread wood screw | About 1.5 to 2 inches | Avoid overdriving |
Step-by-Step Installation of Repair Screws From Above and Below
Working from above is the most common method because it needs no crawl space access. Working from below holds better on loose panels because adhesive and shims address the gap directly. The right choice depends on your access, your floor covering, and whether the squeak is a loose fastener or a panel rubbing a joist.
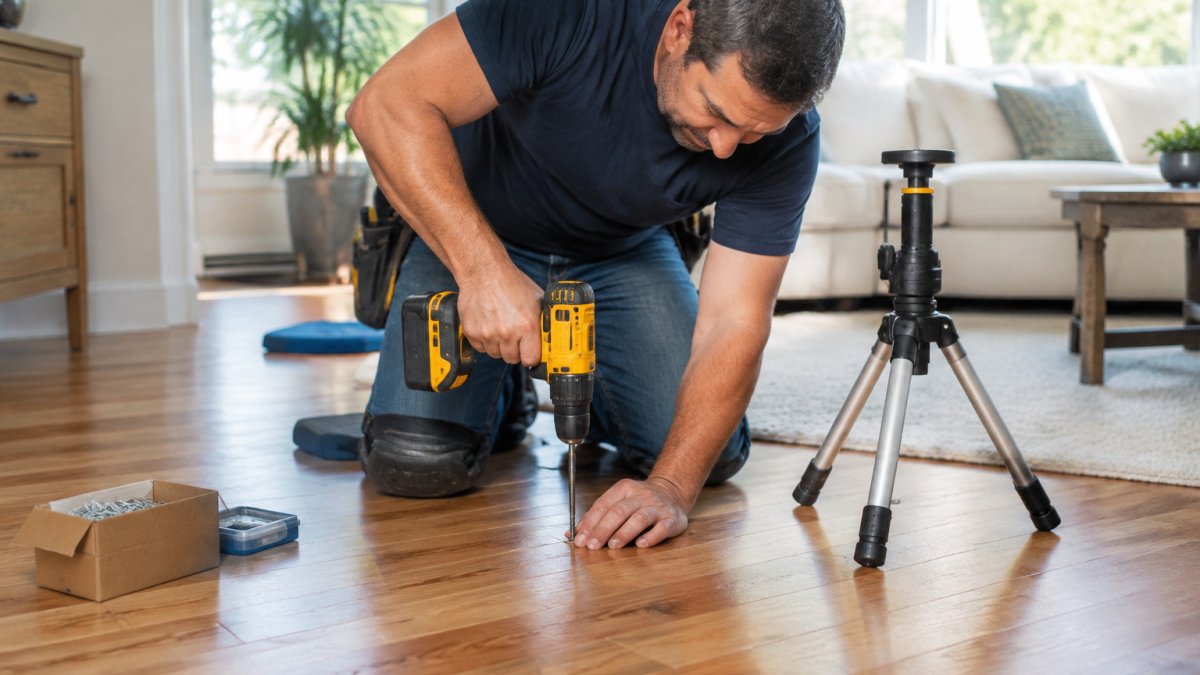
Repairing From Above
- Locate the joist with a finder and mark the center line with painter's tape.
- Drill a pilot hole through the subfloor. For hardwood, the pilot hole should be slightly smaller than the screw shank to prevent splitting.
- Drive the screw until it is snug. Stop when the clutch slips or the head seats; do not overtighten.
- Test the spot by walking over it before moving to the next mark.
- Repeat for each squeak you marked.
For carpet, use a counter-snap screw and tripod so the head breaks off below the pile. For vinyl, use a fine-thread screw and drive slowly to avoid cracking the surface. For hardwood, fill the pilot hole and screw head with a matching wood plug or filler after the repair.
Repairing From Below
- Locate the gap between the joist and the subfloor.
- Apply a bead of construction adhesive into the gap, or tap a wood shim into it with a utility knife trimming to fit.
- Secure the panel with a screw driven from below into the subfloor, or clamp until the adhesive sets.
- Test the spot from above.
Shims are inexpensive and effective, but they need careful placement so you do not lift the floor and create a new high spot. Adhesive works best on panels that have separated cleanly; shims work best on gaps that are wide enough to accept them.
Above vs. Below: Trade-Offs
| Factor | From Above | From Below |
|---|---|---|
| Access needed | None beyond the room | Basement or crawl space |
| Best for | Loose fasteners, carpet, vinyl | Loose panels, hardwood, engineered wood |
| Finish repair | Needed for hardwood and vinyl | None |
| Hold on loose panels | Good | Better |
| Time per squeak | Faster | Slower but more thorough |
Troubleshooting Common Mistakes
A screw that spins without tightening has missed the joist. Back it out, re-mark the joist line, and try again. A screw that cracks the subfloor was overdriven or driven without a pilot hole; stop, fill the crack, and reduce clutch setting on the next screw. A squeak that returns within a week usually means the panel is still moving against the joist, which calls for adhesive or a shim from below rather than another screw.
Watch out: driving a second screw beside a failed one without re-checking the joist line doubles the chance of missing the framing and cracking the panel. Re-mark before every retry.
Building a Squeaky Floor Repair Kit for Hardwood, Carpet and Vinyl
A good kit covers all three floor types. For carpet, a squeaky floor repair kit with counter-snap screws and a tripod fixture keeps the job clean. For hardwood, pilot holes and quality wood screws protect the finish. For vinyl, a fine-thread screw avoids cracking the surface.
Pack these items for your kit: a cordless drill, a joist finder, a tape measure, counter-snap or wood screws in two lengths, wood shims, a utility knife, a caulk gun with construction adhesive, and painter's tape for marking. Keep the kit together so you can finish a repair in one trip.
Booking a Professional Fix When DIY Is Not Enough
Some squeaks need more than a screw. If the subfloor is rotted, the joists are damaged, or moisture keeps returning, a professional should look at the job. A professional can also save you time when the floor is large or the squeaks are spread across several rooms.
Freddie Sanchez Hardwood Floors handles wood floor installation with clear communication from start to finish. If you are weighing the cost of professional work, our page on hardwood floor installation costs in 2026 explains what to expect. For local help, you can also look into local wood floor installation experts.
Before you hire anyone, ask for a written estimate and confirm what the work includes. Pricing depends on the size of the floor, the access you have from below, and the extent of the damage, so request a quote for your specific project.
Frequently Asked Questions
How do I repair a squeaky subfloor?
Start by locating the squeak and confirming which joist it sits over with a joist finder or stud finder. Mark the joist line, then drive two or three construction screws at a slight angle through the subfloor into the joist, using a pilot hole to prevent splitting. From above, use counter-snap screws through carpet or hardwood so the head sits below the surface. Work from the squeak outward, and check the floor after each fastener to confirm the movement has stopped.
What is a good tool for fixing squeaky floors?
A joist finder and a cordless drill are the two tools that matter most. The joist finder locates the framing so every screw lands in solid wood instead of empty space, and the drill drives the fasteners quickly and consistently. A tripod fixture or depth gauge helps keep counter-snap screws at the right height. For gaps between the subfloor and joists from below, a caulk gun with construction adhesive or wood shims are reliable additions.
What type of screws should I use to fix a squeaky subfloor?
Use coarse-thread construction screws long enough to pass through the subfloor and bite at least one inch into the joist. For carpeted floors, counter-snap screws are designed to break off below the surface, leaving no visible head. Avoid drywall screws, which are brittle and can snap under load. Choose screws labeled for structural use and match the length to your subfloor thickness plus the joist depth you need to reach.
Do squeaky floor repair kits work?
Kits can work well for squeaks caused by subfloor movement against joists, especially when the kit includes a joist finder and a depth-controlled fixture. They are less effective when the squeak comes from a worn subfloor panel, a failed nail, or framing that has shifted significantly. Identify the source first, then judge whether a kit addresses it. Persistent squeaks after a careful repair may call for a professional inspection.